Blog

  • Hiking for Beginners: 9 Tips to Help You Hit the Trails

    Hiking for Beginners: 9 Tips to Help You Hit the Trails

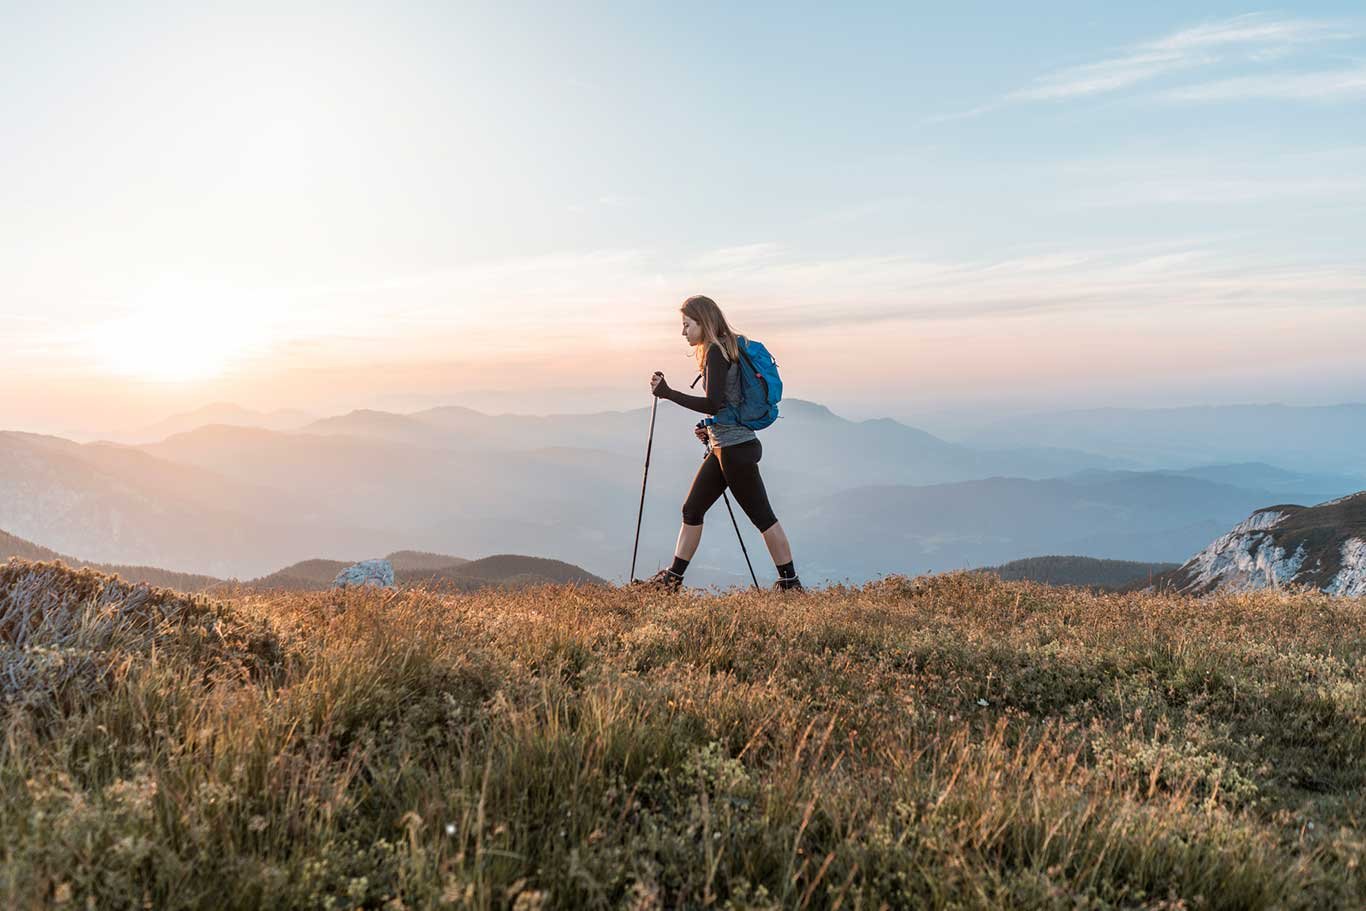
    I still remember my very first hike like it was yesterday. It was a crisp fall morning in my local county park, just a two-mile loop that felt like climbing Everest to my out-of-shape self. I showed up in old sneakers and cotton jeans—big mistake—and by the end, I was sweaty, blistered, and hooked. That simple trail opened a door to something bigger: fresh air that clears your head, views that make your heart swell, and a quiet pride in putting one foot in front of the other. If you’re reading this, you’re probably standing at the same trailhead I was, wondering where to even begin. Good news—you don’t need to be an expert or drop a fortune on gear. These nine practical tips, drawn from years of trial, error, and dusty boots, will get you out there safely and happily. Let’s turn that nervous excitement into your first real trail story.

    Hiking isn’t about conquering mountains on day one. It’s about showing up, learning as you go, and letting the outdoors do its magic. Whether you’re in a bustling city like Lahore with nearby hills or somewhere with endless national parks, the basics stay the same. This guide covers everything from picking your first trail to packing smart and staying safe. Stick with it, and you’ll wonder why you waited so long.

    Why Hiking Is the Perfect Starter Adventure for Anyone

    Hiking welcomes everyone—no gym membership or fancy skills required. It builds strength, clears the mind, and connects you to nature in ways scrolling never could. Studies show it lowers stress and boosts mood, but the real win is that first “I did it” feeling.

    Start slow, stay curious, and the trails will reward you. Now, let’s dive into the nine tips that changed how I hike forever.

    Tip 1: Start Small and Local to Build Real Confidence

    Picking a short, nearby trail takes the pressure off and lets you focus on the fun instead of logistics. I once drove two hours for a “beginner” hike that kicked my butt—lesson learned. Local parks or green spaces mean easy access, bathrooms, and quick bailouts if needed. You’ll finish feeling accomplished, not exhausted, and that momentum carries you forward.

    Why Distance from Home Matters More Than You Think

    Staying close cuts travel fatigue and lets you test your gear and body without big commitments. Plus, familiar spots mean you can return often, noticing seasonal changes that make each hike feel new. No epic views required—those come later.

    How to Scout Beginner-Friendly Trails Without Overwhelm

    Use free apps like AllTrails to filter for easy, under-three-mile loops with minimal elevation. Read recent reviews for real talk on mud or crowds. Local visitor centers or park rangers often suggest hidden gems too. Start with flat paths and work up—your future self will thank you.

    Real Talk: My First Local Loop That Hooked Me

    That two-miler near home had wildflowers and a tiny creek. I laughed at my own heavy breathing but finished grinning. It proved hiking doesn’t demand perfection—just presence.

    Tip 2: Choose the Right Trail by Matching It to Your Fitness and Mood

    Not every trail suits every day. A flat lakeside stroll feels worlds apart from a rocky climb. Match the hike to your current energy, weather, and goals. Overambitious choices lead to frustration—trust me, I’ve turned back early more than once.

    Understanding Trail Ratings and What They Really Mean

    Easy trails usually mean under 5 miles with gentle slopes. Check elevation gain (under 500 feet is forgiving) and surface type. Apps rate difficulty, but always skim user photos and comments for surprises like roots or stream crossings.

    Seasonal Smarts That Keep Hikes Enjoyable

    Spring brings wildflowers but mud; summer means bugs and heat. Fall offers crisp air and colors, while winter tests your layers. Factor these in and you’ll avoid nasty surprises.

    Comparison: Easy vs. Moderate Trails for Beginners

    AspectEasy TrailModerate Trail
    Distance1-3 miles4-6 miles
    Elevation GainUnder 300 feet500-800 feet
    TerrainPaved or smooth dirtRocky with some roots
    Best ForFirst-timers, familiesBuilding stamina
    Time Estimate1-2 hours2-4 hours

    Pick easy until you’re craving more—progress feels fantastic.

    Tip 3: Gear Up Wisely Without Emptying Your Wallet

    You don’t need top-of-the-line everything to start. I hiked my first year in budget finds and hand-me-downs. Focus on comfort and function over brands. A good pair of shoes and layers make all the difference; the rest can wait.

    Footwear That Prevents Blisters and Regret

    Sturdy sneakers or trail runners work for most beginner paths—break them in with short walks first. Save stiff boots for rougher terrain later. Wool or synthetic socks wick moisture and fight blisters better than cotton.

    Clothing Choices That Handle Changing Conditions

    Moisture-wicking shirts and quick-dry pants beat cotton every time. I once sweated through a tee and froze on the way down—never again. Pack a light jacket even if the forecast looks perfect.

    Backpack and Day-Hike Essentials on a Budget

    A 15-20 liter daypack holds water, snacks, and layers. No need for fancy; check thrift stores or entry-level options from REI or Decathlon. Test the fit before you hit the trail.

    Tip 4: Master Layering and Weather Prep Like a Seasoned Hiker

    Weather shifts fast on trails. Layering keeps you comfortable without overheating or shivering. I check forecasts obsessively now, and it saves every hike. A little prep turns potential misery into pure enjoyment.

    The Layering System That Actually Works

    Base layer wicks sweat, mid-layer insulates, outer shell blocks wind and rain. Adjust as you go—peel off when climbing, add when resting. Light and packable is key.

    Why Point Forecasts Beat General Apps

    Use tools like NOAA for specific trailhead predictions. Mountain weather differs from town by miles. One surprise shower taught me to always carry a lightweight rain jacket.

    Light Humor from My Soggy Mistake

    Forgot the jacket once. Ended up using my pack as an umbrella—hilarious in hindsight, but soggy in the moment. Don’t be me.

    Tip 5: Pack the 10 Essentials Every Single Time

    This list from the American Hiking Society has saved me more than once. It’s not overkill—it’s smart insurance. Tailor it lightly for day hikes but never skip the basics.

    The Complete 10 Essentials Breakdown

    • Navigation: Map, compass, or phone app with offline maps
    • Sun protection: Sunscreen, hat, sunglasses
    • Insulation: Extra layers for cold snaps
    • Illumination: Headlamp with extra batteries
    • First-aid supplies: Basic kit with bandages and meds
    • Fire: Matches or lighter in waterproof case
    • Repair kit: Duct tape, knife or multi-tool
    • Nutrition: Extra snacks beyond what you plan to eat
    • Hydration: Water and treatment method
    • Emergency shelter: Space blanket or bivy

    Carry them in a small pouch—easy and lightweight.

    Why Extras Like a Whistle and Phone Battery Matter

    A whistle signals for help better than yelling. Keep your phone charged and in airplane mode to save juice. These small items bring big peace of mind.

    Quick Packing Checklist You Can Copy

    Print this or save it: water (at least 1 liter per 2 hours), snacks, map, layers, first aid, sunscreen, headlamp, multi-tool, emergency blanket, whistle.

    Tip 6: Get Your Body Trail-Ready Before You Go

    You don’t need to be an athlete, but some prep prevents soreness and injury. I started with neighborhood walks and stair climbs—simple stuff that made hikes feel doable. Listen to your body from day one.

    Simple Pre-Hike Training Anyone Can Do

    Add 20-30 minute walks a few times a week. Include hills or stairs to build leg strength and lungs. Stretch afterward to stay flexible.

    Fueling Right So You Don’t Bonk

    Eat a balanced meal two hours before. Pack carbs like bananas or trail mix for steady energy. Hydrate the day before—not just on the trail.

    Pros and Cons of Solo Training vs. Group Prep

    Pros of solo: Flexible schedule, builds personal confidence.
    Cons of solo: Less motivation on tough days.
    Pros of group: Accountability and fun.
    Cons of group: Scheduling hassles.

    Mix both for best results.

    Tip 7: Learn Basic Navigation and Safety Habits

    Getting lost kills the vibe. Basic skills keep you on track and calm. I rely on apps but always carry a paper map as backup—technology fails.

    Apps and Tools That Make Navigation Easy

    AllTrails or Gaia GPS for offline maps and GPX files. Download routes ahead. Practice reading them at home first.

    The Golden Rule of Telling Someone Your Plans

    Text a friend your trail, start time, and expected return. Add a note in your car if parking at a trailhead. It takes 30 seconds and could save your life.

    What to Do If Things Go Sideways

    Stop, stay calm, and backtrack if unsure. Use your whistle in threes for distress. Modern phones have emergency SOS—know how yours works.

    Tip 8: Embrace Leave No Trace and Trail Etiquette

    Respecting the trail keeps it beautiful for everyone. I once saw trash ruin a perfect viewpoint—don’t be that person. These principles are simple but powerful.

    The Seven Leave No Trace Principles Summarized

    Plan ahead, travel on durable surfaces, dispose of waste properly, leave what you find, minimize campfire impact, respect wildlife, and be considerate of others.

    Etiquette That Makes You a Welcome Hiker

    Yield to uphill traffic. Keep noise low—no speakers. Step aside for faster folks. Pack out everything, including peels and wrappers.

    Why It Feels Good to Hike Responsibly

    Knowing you left zero trace adds to the satisfaction. Wildlife stays wild, and trails stay open. It’s a small act with big impact.

    Tip 9: Listen to Your Body and Celebrate Every Step

    Hiking is about enjoyment, not miles logged. Turn around if something feels off—pride isn’t worth injury. I now end hikes with a quiet thank-you moment, even on easy days.

    Signs It’s Time to Slow Down or Stop

    Persistent pain, dizziness, or extreme fatigue mean rest or retreat. Hydrate, snack, and reassess. No shame in a shorter hike.

    Building the Mental Side of the Sport

    Notice the birdsong, the way light filters through trees. Gratitude turns a good hike into a memorable one. Journal a quick note afterward—it sticks.

    How to Level Up After Your First Few Outings

    Review what worked. Add distance gradually. Join a local hiking group for camaraderie and tips. The journey compounds beautifully.

    People Also Ask About Hiking for Beginners

    These questions pop up constantly in searches—here are straight answers based on real beginner experiences.

    What should beginners wear hiking?
    Moisture-wicking layers, comfortable shoes or trail runners, and socks that prevent blisters. Avoid cotton—it holds sweat and chills you. A hat and light rain jacket cover most surprises.

    How far can a beginner hike in a day?
    Start with 2-4 miles on easy terrain. Pace yourself at about 2 miles per hour. Build up as fitness improves—rushing leads to sore muscles and lost joy.

    Do I need special gear to start hiking?
    No. Sneakers, a daypack, water, and snacks get you going. Add the 10 essentials as you progress. Focus on fit and comfort over cost.

    Is hiking safe for beginners alone?
    Yes, on popular, well-marked trails during daylight. Always share plans, carry a charged phone, and start small. Group hikes build confidence faster at first.

    What are the easiest hiking trails for beginners?
    Look for flat, short loops in local parks or national park easy-rated paths like Lower Yosemite Falls or Jordan Pond Path. Apps make finding them effortless.

    FAQ: Your Most Common Hiking Beginner Questions Answered

    How do I find hiking trails near me?
    Download AllTrails or visit park websites. Search by “easy” and distance. Local Facebook groups or REI stores often share hidden spots too.

    What snacks work best on the trail?
    Trail mix, energy bars, fruit, and jerky. Aim for 200-300 calories per hour. Salty and sweet combos keep energy steady.

    How do I avoid blisters on my first hikes?
    Break in shoes gradually. Wear moisture-wicking socks. Stop at the first hot spot and apply moleskin or tape.

    Can kids or older adults start hiking?
    Absolutely. Choose very short, flat trails and go at their pace. Everyone benefits from the fresh air and movement.

    What if I get scared of wildlife?
    Make noise, keep distance, and research local animals ahead. Most encounters end peacefully when you respect their space.

    Hiking has a way of sneaking into your soul. One easy trail leads to another, and before long you’re planning bigger adventures with stories to tell. You already have everything it takes—just lace up and step outside. Your first trail is waiting, and it might just change how you see the world. Go find it. What are you waiting for?

  • 10 Tips for Whitewater Rafting for Beginners

    10 Tips for Whitewater Rafting for Beginners

    I still remember the first time I dipped a paddle into churning whitewater. My heart hammered like a drum, spray hit my face, and for a split second I wondered if I’d made a huge mistake signing up for that Class III run on the Rogue River. But by the end of the day, I was hooked—laughing with my raftmates, high-fiving strangers who’d become instant friends, and already planning my next trip. Whitewater rafting isn’t just an adrenaline rush; it’s one of the most accessible outdoor adventures for beginners who want real excitement without needing years of experience. With the right preparation, anyone reasonably fit and open to a little splash can enjoy it safely and have the time of their life.

    The sport has grown hugely in popularity because outfitters now cater specifically to first-timers. Modern rafts are stable, guides are pros, and safety standards are higher than ever. Yet many beginners still show up unprepared, overpacked, or unsure what to expect. That’s why I put together these 10 practical tips drawn from more than a dozen trips I’ve guided and taken myself. Whether you’re eyeing a half-day splash on a gentle river or dreaming of a multi-day expedition, these insights will help you avoid rookie mistakes, stay safe, and soak up every moment. Let’s dive in.

    Tip 1: Choose the Right Outfitter and Match the Trip to Your Experience Level

    Picking a licensed, experienced outfitter is the single most important decision you’ll make as a beginner. Reputable companies carry proper insurance, employ certified guides with thousands of river miles under their belts, and match trips to skill levels so no one feels overwhelmed. I once joined a trip with a fly-by-night operator who skipped the full safety briefing—never again. Stick with outfitters that have strong reviews on sites like TripAdvisor or REI Adventures and belong to organizations such as America’s Rafting Association.

    Why Reputation Matters
    A good outfitter doesn’t just provide gear; they create a supportive environment where beginners feel confident. They’ll answer questions honestly, accommodate dietary needs, and have backup plans for weather. Look for companies that offer pre-trip videos or orientation calls—that extra touch shows they care about your experience from day one.

    Understanding Rapid Classes – Your Beginner Roadmap
    Rivers are rated on the International Scale from Class I to VI. For your first trip, aim for Class II or easy Class III. Here’s a simple comparison:

    ClassDescriptionBest ForWhat It Feels Like
    ICalm water, small rifflesFamilies, total newbiesScenic float with gentle bumps
    IIEasy waves, clear channelsBeginners wanting funSplashy but predictable
    IIIModerate waves, some rocksAdventurous first-timersThrilling drops and spins
    IV+Intense, technicalExperienced onlyHigh stakes—save for later

    Start mild, build confidence, and you’ll be tackling bigger water sooner than you think.

    Tip 2: Honestly Assess Your Fitness and Swimming Comfort

    You don’t need to be an athlete, but a moderate fitness level helps you paddle for 2–4 hours and climb in and out of the raft on rocky banks. I tell every group: if you can walk a couple of miles and climb stairs without stopping, you’re probably ready. Swimming ability isn’t mandatory because you’ll wear a Coast Guard-approved PFD (personal flotation device), but feeling comfortable in water reduces panic if you take an unplanned swim.

    Building Confidence Before You Launch
    Spend a week or two doing light cardio and core exercises—planks, rowing machine, or even practice paddling motions on dry land. Mental prep counts too. Talk to friends who’ve rafted or watch calm river videos to visualize success. One beginner I guided was terrified until we practiced the “swimmer’s position” on shore; by launch time she was smiling.

    Pros and Cons of Different Trip Lengths for Beginners

    • Half-day trips: Pros—short commitment, less fatigue; Cons—less time to relax into the experience.
    • Full-day: Pros—full immersion and lunch on the river; Cons—longer paddle time.
      Choose based on your energy, not bravado.

    Tip 3: Dress for the Water, Not the Weather

    Cotton is the enemy—once wet it stays wet, gets heavy, and chills you fast. I learned this the hard way on a cool morning when my favorite T-shirt turned me into a shivering mess. Opt for synthetic quick-dry fabrics, wool blends, or neoprene if the water is cold. Layer up: base layer, insulating mid-layer, and a splash jacket.

    What to Wear Whitewater Rafting – The Complete List

    • Swimsuit or quick-dry shorts as your base.
    • Synthetic long-sleeve shirt for sun protection.
    • Fleece or wool pullover for cooler days.
    • River shoes or sandals with heel straps—no flip-flops!
    • Wool socks if it’s chilly.

    Dress for the water temperature (often 50–60°F even in summer) and you’ll stay comfortable instead of miserable.

    Tip 4: Pack Smart and Leave the Extras Behind

    Overpacking is a classic beginner trap. Outfitters provide dry bags, so focus on essentials only. I always laugh when someone shows up with a suitcase—river life is simple by design. Bring only what fits in a small day bag plus a change of clothes for the car ride home.

    Essential Packing List for Beginners

    • Refillable water bottle (hydration is non-negotiable).
    • Sunscreen (SPF 50+, water-resistant) and lip balm.
    • Sunglasses with Croakies-style strap.
    • Hat or visor that fits under a helmet.
    • Small towel in a plastic bag.
    • Snack bars if lunch isn’t provided.
    • Camera or phone in a waterproof case (optional—many guides take group photos).

    Leave jewelry, phones without protection, and anything you’d cry over losing. One simple dry bag rule: if it doesn’t fit, it doesn’t go.

    Tip 5: Listen Like Your Life Depends on It During the Safety Briefing

    Every guide starts with a thorough briefing—pay attention even if you feel impatient. They cover paddle strokes, commands, what to do if the raft flips, and emergency signals. I’ve seen too many people tune out and regret it when the first rapid hits.

    Key Safety Rules Every Beginner Must Know

    • Keep your PFD zipped and snug at all times.
    • Helmet stays on until you’re back on shore.
    • Feet tucked under the thwart for stability.
    • Listen for commands and respond immediately.

    These few minutes on shore can make the difference between a smooth ride and an avoidable swim.

    Tip 6: Master Basic Paddle Techniques and Commands

    Paddling is a team effort. Sit tall, plant your feet, and use your core—not just arms. The guide calls commands; your job is to execute them in sync. Practice the basic strokes on dry land before you launch.

    Common Paddle Commands You’ll Hear

    • Forward paddle: Everyone digs in together—keep strokes short and powerful.
    • Back paddle: Reverse motion to slow or turn.
    • Left back / Right back: Turns the raft by paddling opposite sides.
    • Stop: Lift paddle out of water immediately.
    • High side: Lean toward the high side if you hit a rock to prevent flipping.
    • Hold on / Get down: Grab the safety line and lower your center of gravity in big waves.

    Sync with the person in front of you and you’ll feel like a pro in minutes.

    Tip 7: Know Exactly What to Do If You Fall Out

    It happens to the best of us—even guides take the occasional swim. The golden rule: never stand up in moving water. Get into “swimmer’s position”—on your back, feet up and pointing downstream, arms across your chest or holding the paddle if you have it. Float until calmer water, then swim to the raft or shore as directed.

    Real-World Example That Saved the Day
    During one trip a woman flipped out in a Class III rapid. Because she remembered to keep feet up, she avoided foot entrapment and was back in the boat laughing within 30 seconds. Panic leads to bad decisions; calm technique keeps you safe.

    Tip 8: Protect Yourself from Sun, Cold, and Dehydration

    The river reflects UV rays like a mirror, and splashing water can hide how cold you’re getting. Reapply sunscreen every two hours, stay hydrated, and have a fleece ready for shade breaks. I keep a lightweight rain jacket handy even on sunny days—mountain weather changes fast.

    Quick Sun and Hydration Checklist

    • Broad-spectrum sunscreen on every exposed inch.
    • Electrolyte packets in your water bottle.
    • Sunglasses and hat for eye and scalp protection.
    • Avoid alcohol the night before—dehydration sneaks up on you.

    Tip 9: Embrace the Team Spirit and Trust Your Guide

    Rafting is a group activity. Cheer each other on, communicate clearly, and follow the guide’s lead without second-guessing. The best trips happen when everyone paddles together and laughs at the splashes. I’ve watched shy beginners turn into the loudest cheerleaders by the final rapid.

    Why Group Dynamics Make or Break the Trip
    A positive attitude spreads. If someone freezes, encourage them gently. Guides have seen every scenario—trust their calls even when it feels counterintuitive.

    Tip 10: Reflect, Recover, and Plan Your Next Adventure

    After you pull out, change into dry clothes, tip your guide generously (they work hard for those smiles), and debrief over a meal. Note what you loved and what surprised you. Many beginners return within months for bigger water. My own progression from Class II nerves to Class IV confidence happened because I reflected after every trip.

    Post-Trip Care Tips

    • Hydrate and stretch to avoid soreness.
    • Share photos and stories—they build the memories.
    • Research your next river using American Whitewater’s database for accurate class ratings.

    Whitewater rafting rewards those who come prepared and stay open to the unexpected. These 10 tips aren’t just a checklist—they’re your ticket to confidence, safety, and pure joy on the river. You’ll come home sunburned, sore, and absolutely grinning. That first trip might feel a little scary, but trust me: the river has a way of turning beginners into lifelong enthusiasts.

    People Also Ask: Common Questions About Whitewater Rafting for Beginners

    Is whitewater rafting safe for beginners?
    Yes—when you choose a reputable outfitter and follow instructions. Modern gear and trained guides keep risk low on Class II–III rivers. Serious injuries are rare compared to many other adventure sports.

    What should beginners wear for whitewater rafting?
    Quick-dry synthetics or wool, river shoes with straps, and layers. Skip cotton and loose flip-flops. A swimsuit base plus sun-protective top is perfect.

    Do you need to know how to swim to go rafting?
    No. The PFD keeps you afloat, and guides teach you the proper floating position. Comfort in water helps, but it’s not required for beginner trips.

    How difficult is whitewater rafting for first-timers?
    Most describe it as moderately challenging but very doable. The guide handles the hard steering; you just paddle when told. Class II feels fun, not frightening.

    What age is appropriate for whitewater rafting?
    Many outfitters welcome kids as young as 6–8 on Class II sections. Always check specific age and weight minimums for your chosen river.

    Frequently Asked Questions

    What if the raft flips?
    Stay calm, get into swimmer’s position, and follow guide instructions. Rafts are designed to be righted quickly, and everyone practices the drill.

    How much does a beginner rafting trip cost?
    Half-day trips usually run $80–$150 per person; full days $120–$250. Prices include gear, lunch, and transport—book early for best rates.

    Can I bring my phone or camera?
    Only in a waterproof case secured to your PFD. Many prefer letting the guide handle photos so you can focus on the experience.

    Is there a weight limit?
    Most rafts accommodate a wide range, but confirm with your outfitter. Average maximum per person is around 250–300 lbs.

    What’s the best time of year for beginner rafting?
    Late spring through early fall when water levels are manageable and weather is warmer. Check local flow reports for ideal conditions.

    You’ve got everything you need to make your first whitewater rafting trip unforgettable. Grab your quick-dry gear, book that trip, and get ready for the thrill of a lifetime. The river is waiting—and it’s going to be epic. Safe paddling!

  • The Benefits of Hiking: Why You Should Lace Up Your Boots and Hit the Trails

    The Benefits of Hiking: Why You Should Lace Up Your Boots and Hit the Trails

    I still remember my first real hike like it was yesterday. It was a steep trail through pine-scented woods, legs burning, sweat dripping, and yet by the time I reached the overlook, something shifted inside me. The stress of deadlines and endless notifications melted away. That moment hooked me, and over the years, hiking has become my go-to reset button—for my body, my mind, and even my relationships. If you’re wondering whether those boots gathering dust in your closet are worth pulling out, the answer is a resounding yes. Hiking delivers benefits that go far beyond a simple workout, backed by science and real-life stories from trail lovers everywhere.

    Why Hiking Stands Out as the Ultimate Low-Impact Exercise

    Hiking combines the best of cardio, strength training, and nature immersion in one accessible package. Unlike treadmill sessions or gym routines that can feel repetitive, every step on a trail challenges your body in unpredictable ways while feeding your soul with fresh air and views that make the effort worthwhile. It’s free or low-cost, adaptable for beginners and experts alike, and delivers results that stick because it feels more like adventure than exercise.

    Physical Benefits of Hiking: Building a Stronger, Healthier Body

    Hiking turns your entire body into a well-oiled machine without the joint-pounding of running or heavy lifting. The uneven terrain engages muscles you didn’t know you had, while the steady rhythm strengthens your heart and lungs in ways that translate to everyday life.

    Boosting Cardiovascular Health and Lowering Disease Risk

    Your heart gets a serious workout as you climb and descend, improving circulation and VO2 max—the measure of how efficiently your body uses oxygen. Studies show regular hikers slash their risk of heart disease, with blood pressure dropping 4-10 points from the activity alone. Non-exercisers face twice the chance of coronary issues, but consistent trail time flips that script.

    Strengthening Muscles, Balance, and Bone Density

    Every rock, root, and incline forces your core, legs, and stabilizers to work overtime, building functional strength that prevents falls as you age. Weight-bearing steps also boost bone density—women with osteoporosis saw a 6% increase in spinal bone mass after just nine months of regular walks.

    Aiding Weight Management and Burning Serious Calories

    Hiking torches calories efficiently: expect 300-500 per hour on moderate trails, or up to 550+ with a pack and hills, far more than flat walking. The post-hike metabolism boost can keep burning energy for hours afterward, making sustainable weight loss feel effortless rather than forced.

    Enhancing Immune Function and Joint Health

    Fresh air and movement reduce inflammation while vitamin D from sunlight supports immunity. For arthritis sufferers, the low-impact nature (three times body weight per step versus eight when running) eases stiffness and pain without sacrificing results.

    Mental Health Benefits of Hiking: Nature’s Built-In Therapy

    There’s something magical about how trails quiet the mental chatter. Science confirms what hikers have felt for centuries: time in green spaces rewires your brain for calm and clarity.

    Reducing Stress and Anxiety Naturally

    A 90-minute nature walk slashes activity in the brain region linked to rumination—the endless loop of worries that fuels anxiety. Cortisol levels drop, your parasympathetic system kicks in, and suddenly problems feel more manageable.

    Fighting Depression and Lifting Mood

    Endorphins flood your system, serotonin sensitivity improves, and exposure to green hues has measurable therapeutic effects. Stanford research found lower depression risk after forest walks compared to urban ones.

    Sharpening Focus, Creativity, and Cognitive Function

    Uneven paths demand constant navigation and problem-solving, boosting brain-derived neurotrophic factor (BDNF) that grows new neural connections. One study showed a 50% creativity spike after four days immersed in nature.

    Improving Sleep Quality Through Outdoor Rhythms

    Daylight exposure resets your circadian clock while physical fatigue deepens restorative sleep. Many hikers report falling asleep faster and waking refreshed—no more scrolling-induced insomnia.

    Social and Emotional Perks: Hiking Beyond Solo Adventures

    Hiking isn’t just about you—it’s a powerful connector. Sharing trails creates bonds that last long after the hike ends.

    Building Community and Stronger Relationships

    Group hikes foster teamwork, laughter, and vulnerability during tough sections. Friends or family members who struggle to connect indoors often open up on the trail, turning acquaintances into lifelong supporters.

    Fostering Mindfulness and Self-Reflection

    Without screens or distractions, your mind settles into the present moment. Many describe “trail therapy” moments where big life decisions suddenly become clear amid the rhythm of footsteps.

    Environmental and Spiritual Rewards of Hiking

    The trails don’t just change you—they remind you of your place in something bigger.

    Deepening Your Connection to Nature

    Sights, sounds, and scents awaken senses dulled by indoor life. You leave with greater appreciation for ecosystems, often inspiring conservation actions in your daily routine.

    Contributing to Conservation Efforts

    Hikers who love trails tend to protect them. Many join cleanups or advocacy groups, creating a virtuous cycle where personal health supports planetary health.

    Is Hiking Right for Everyone? Pros, Cons, and Smart Comparisons

    Hiking shines for most people, but it’s wise to weigh the full picture before diving in.

    Pros and Cons of Hiking Versus Gym Workouts

    AspectHikingGym Workout
    CostFree or low (trails/parks)Membership fees add up
    VarietyEndless new trails & viewsRepetitive machines/routines
    Mental BoostNature therapy + endorphinsIndoor focus, less sensory
    Injury RiskUneven terrain (if unprepared)Controlled but repetitive strain
    Social ElementGroup-friendly adventuresOften solitary
    Calorie Burn300-550+/hr (terrain-dependent)Predictable but lower variety

    Hiking wins for sustainability and joy, while gyms offer weather-proof consistency.

    Potential Drawbacks and How to Overcome Them

    Blisters, twisted ankles, or weather surprises can happen, but proper boots, poles, and apps like AllTrails minimize risks. Start small, listen to your body, and the rewards far outweigh the occasional sore muscles.

    How to Get Started with Hiking for Maximum Benefits

    Choose easy local trails first, invest in supportive boots and trekking poles, and use free apps for route planning. Pack water, snacks, and a lightweight rain jacket—your future self will thank you.

    People Also Ask: Answering Your Top Questions on Hiking Benefits

    What are the main physical benefits of hiking?
    Improved heart health, stronger muscles and bones, better balance, weight management, and lower disease risk—all from one enjoyable activity.

    Does hiking help with mental health?
    Absolutely. It reduces stress, anxiety, and depression symptoms while boosting mood, creativity, and sleep through nature exposure and movement.

    How many calories does hiking burn compared to walking?
    Roughly double on moderate trails—300-500+ per hour versus 200-300 for flat walking, thanks to inclines and uneven ground.

    Is hiking better than the gym for overall fitness?
    It often is for functional strength, mental wellness, and sustainability, though combining both gives the best of both worlds.

    What gear do beginners need to maximize benefits safely?
    Quality hiking boots, moisture-wicking layers, trekking poles, a daypack, and a reliable navigation app—start simple and upgrade as you progress.

    FAQ: Your Most Common Hiking Benefits Questions Answered

    How often should I hike to see real benefits?
    Aim for 2-3 times weekly, starting with 30-60 minutes. Consistency matters more than distance—your body and mind will notice changes within weeks.

    Can hiking help if I already have health conditions like diabetes or arthritis?
    Yes, with doctor approval. It improves insulin sensitivity, eases joint pain, and supports weight control without high impact.

    What if I live in a city—can urban hiking deliver the same perks?
    Absolutely. Park trails and greenways provide similar cardiovascular and mental boosts, especially when you focus on mindful steps.

    Will hiking alone or with others give different benefits?
    Solo builds self-reliance and deep reflection; groups add social connection and motivation. Both deliver powerful results.

    How do I stay motivated long-term?
    Track progress with a journal, join local hiking groups, or set mini-adventures like sunrise summits. The views never get old.

    Hiking isn’t just exercise—it’s a lifestyle upgrade that pays dividends in energy, clarity, and joy. Whether you’re chasing fitness goals, craving peace of mind, or simply wanting more adventure, the trails are waiting. Lace up, step out, and discover what your body and spirit have been missing. Your first summit might just change everything.

  • What Is White Water Kayaking?

    What Is White Water Kayaking?

    White water rafting and kayaking deliver two distinct flavors of river adventure, both pulsing with adrenaline yet feeling worlds apart once you’re on the water. I still remember my first rafting trip down a lively stretch of the Ocoee River years ago—eight of us crammed into a bouncy inflatable boat, paddles slapping in unison, everyone yelling and laughing as we slammed through Class III waves. The guide’s commands cut through the roar, and by the end, we felt like a tight-knit crew that had battled the river together. A couple of seasons later, I tried whitewater kayaking on a milder section of the same watershed. Alone in that sleek little boat, double-bladed paddle in hand, I felt every eddy and current directly under me. It was intimate, almost meditative, but also demanded focus I hadn’t needed in the raft. Both experiences hooked me, but they scratched completely different itches.

    If you’re torn between white water rafting vs kayaking, you’re not alone. Many adventurers wonder which suits their style, fitness level, group size, or thrill tolerance. This guide breaks it all down with clear comparisons, real-world insights, and practical advice so you can decide what fits you best—and maybe even try both.

    What Is White Water Rafting?

    White water rafting involves navigating fast-moving rivers with rapids in a large, inflatable raft, usually with a group of 6 to 10 people plus a professional guide. You paddle together on command, working as a team to punch through waves, dodge rocks, and ride the current.

    Rafts are stable, self-bailing platforms that sit higher on the water. The guide often sits at the back with longer oars for steering, while guests provide power with shorter paddles. It’s a social, high-energy activity perfect for families, friends, or corporate teams seeking shared excitement without needing advanced individual skills.

    What Is White Water Kayaking?

    White water kayaking puts you in a small, closed or sit-on-top kayak designed for maneuverability in rapids. You paddle solo (or occasionally in a tandem) with a double-bladed paddle, sitting low with legs extended forward. The boat responds instantly to your strokes, edges, and body movements, letting you carve through tight lines, surf waves, or eddy out for a breather.

    Kayaks feel playful and responsive. Experienced paddlers can roll back upright if they flip, adding a layer of self-reliance that rafting doesn’t require. It’s more about personal connection with the river’s flow than group coordination.

    Key Differences Between White Water Rafting and Kayaking

    The biggest contrast starts with the vessel itself. Rafts are big, buoyant, and forgiving; kayaks are nimble, low-profile, and demand precision.

    In a raft, you’re part of a crew. Success depends on synchronized paddling and listening to the guide. In a kayak, you’re the captain—your technique determines every move. Rafts handle bigger volume water well because of their size and stability, while kayaks excel in technical, narrower sections where quick turns matter most.

    Water exposure differs too. Rafts often stay relatively dry except for big splashes—many are self-bailing so only your feet get wet. Kayaks sit closer to the surface, so expect to get soaked, especially in bouncy rapids.

    Socially, rafting builds camaraderie through shared screams and high-fives after big drops. Kayaking offers solitude or small-pod paddling, letting you tune into nature’s rhythms without chatter.

    Group Size and Social Experience

    Rafting shines for groups. One boat can carry a whole family or bachelor party, turning the trip into a bonding event. Everyone contributes, even if some paddle harder than others. I’ve seen shy teens open up after a few rapids when the whole boat cheers them on.

    Kayaking suits solo adventurers or pairs. Tandem kayaks exist, but most whitewater setups are single. If you’re going with friends, you’ll each have your own boat, paddling nearby but handling your own lines. It’s less “team win” and more “personal mastery.”

    For introverts or those craving quiet reflection amid chaos, kayaking wins. For extroverts who love laughter echoing off canyon walls, rafting delivers every time.

    Skill Level and Learning Curve

    Rafting is far more beginner-friendly. On commercial trips, guides handle the technical decisions while you follow simple commands like “forward paddle” or “all left.” No prior experience? No problem for Class II-III runs. Many outfitters welcome kids as young as 8-12 depending on the river.

    Kayaking has a steeper curve. You need to learn proper strokes, bracing, edging, and—crucially—the Eskimo roll for self-rescue. Beginners often start on flatwater or easy Class I-II before tackling whitewater. Inflatable kayaks (sometimes called “duckies”) offer a gentler entry point with more stability than hard-shell whitewater kayaks.

    That said, once you build skills, kayaking rewards progression. You can tackle increasingly technical rivers and even play in features like holes and waves.

    Physical Demands and Fitness Requirements

    Both activities require core strength, upper body endurance, and decent swimming ability, but the demands differ.

    Rafting feels more like interval training—bursts of hard paddling separated by calmer floats. It’s accessible for average fitness levels, though big-water trips can tire your shoulders and back after hours of constant stroking.

    Kayaking engages your whole body continuously. Torso rotation powers efficient strokes, and maintaining balance in turbulent water works your legs and core intensely. Expect a solid workout, especially on longer runs. Lighter, more agile people often find kayaks easier to maneuver, while bigger folks may prefer the raft’s stability.

    Light humor break: After my first full-day kayak session, I felt muscles I didn’t know existed complaining. The raft? Mostly my arms and ego got a workout from all the yelling.

    Thrill Factor and Adrenaline Rush

    Both deliver white-knuckle moments, but the flavor varies.

    Rafting thrills come from big hits—crashing over waves, spinning in eddies, or the collective “whoa” as the boat drops. It’s like a watery roller coaster with friends.

    Kayaking offers a more visceral rush. You feel every surge directly. Surfing a wave, punching through a hole, or threading a narrow slot feels incredibly empowering. The risk of flipping adds edge, but mastering it brings pure joy.

    Many paddlers say kayaking provides a deeper “flow state” because you’re so connected to the river. Rafting gives bigger, shared peaks of excitement.

    Safety Considerations and Risks

    Safety is excellent in both when done responsibly with professionals, but nuances exist.

    Commercial rafting boasts very low fatality rates—around 0.55 per 100,000 user days in many studies—thanks to guides, stable boats, and group support. Most incidents are minor bumps or swims that guides quickly manage. Common injuries involve faces or lower limbs from collisions while swimming.

    Whitewater kayaking carries slightly higher individual risk because you’re solo. Flips happen, and you must self-rescue or rely on nearby paddlers. Fatality rates remain comparable to recreational swimming when wearing proper gear, but they rise with higher class rapids or remote solo trips. Shoulders and backs take the most strain from repetitive paddling.

    Key safety rules apply to both: Always wear a properly fitted PFD (personal flotation device) and helmet. Know the river’s class rating. Never paddle alone in whitewater without experience and a solid safety plan. Cold water, strainers (trees), and hydraulics pose universal dangers.

    Professional outfitters minimize risks dramatically. Guided rafting is often the safest entry into whitewater sports.

    Equipment and Gear Needed

    Rafting gear is straightforward and often provided:

    • Inflatable raft (with guide)
    • Paddles (single-bladed)
    • PFD and helmet
    • Wetsuit or quick-dry clothing, river shoes
    • Sometimes throw bags and first aid for guides

    Kayaking requires more personal investment or rental specifics:

    • Whitewater kayak (hard-shell or inflatable)
    • Double-bladed paddle
    • Spray skirt (for hard-shells to keep water out)
    • PFD, helmet, and often neoprene layers or drysuit
    • Additional safety gear like a throw rope, whistle, and for advanced paddlers, a pin kit or breakdown paddle

    Both need good footwear that won’t slip off. Layering is smart—rivers can be cold even on warm days. Expect to get wet; bring a change of clothes for after.

    Quick Gear Comparison Table

    AspectWhite Water RaftingWhite Water Kayaking
    Boat TypeLarge inflatable, 6-10 peopleSmall, maneuverable, 1-2 people
    PaddleSingle-bladed, group syncDouble-bladed, individual control
    Wetness LevelModerate (self-bailing options)High (closer to water)
    Essential Personal GearPFD, helmet, quick-dry clothesPFD, helmet, spray skirt, layers
    Cost to Rent/BuyLower entry (guided trips include most)Higher for quality kayak and accessories

    Difficulty Levels: Understanding River Classes

    Rivers are rated Class I to VI based on difficulty.

    • Class I-II: Gentle to moderate—ideal for first-timers in either activity. Rafting feels fun and splashy; kayaking builds basic skills.
    • Class III: Challenging with bigger waves and maneuvers. Rafting remains accessible with guides; kayaking requires solid fundamentals.
    • Class IV: Intense, technical—raft crews paddle hard; kayakers need strong boat control and roll proficiency.
    • Class V+: Expert only. Big drops, complex lines. Rafts handle volume but need experienced teams; kayaks demand precision and courage.

    Note that the same rapid can feel different in a raft versus kayak. Kayaks often handle tighter, rockier sections more easily, while rafts shine in powerful, big-water runs.

    Cost Comparison: Rafting vs Kayaking

    Guided rafting trips typically range from $65–$150 per person for a full day, including gear and lunch. Multi-day expeditions climb to $300–$500+ daily when including camping and meals. It’s often all-inclusive, making it straightforward for groups.

    Kayaking costs vary more. Beginner lessons or guided duckie trips might match raft prices initially. Renting a full whitewater setup runs $50–$100/day, while buying quality gear starts at several hundred dollars and goes up. Solo or small-group kayaking can be cheaper long-term once equipped, but instruction is wise upfront.

    Rafting wins for one-off adventures with minimal hassle. Kayaking becomes more economical for frequent paddlers who invest in their own boat.

    Best Places for White Water Rafting and Kayaking

    Popular U.S. destinations overlap but shine differently.

    For rafting: The Ocoee or Pigeon in Tennessee for accessible Class III-IV fun. Colorado’s Arkansas River (Browns Canyon or Royal Gorge) offers variety. California’s South Fork American suits beginners, while Idaho’s Lochsa or Oregon’s Rogue deliver classics. International gems include Costa Rica’s Pacuare or Nepal’s Sun Kosi.

    For kayaking: Steeper creeks in West Virginia or North Carolina reward skilled paddlers. The Ottawa River in Canada is legendary for playboating. Bigger water like the Zambezi (Africa) or Alaska’s Alsek attracts experts. Many rafting rivers also have excellent kayak sections—often the same outfitter offers both.

    Low-water seasons change the feel: Rafts may feel tamer, while kayaks (especially inflatables) stay playful longer.

    Pros and Cons of White Water Rafting

    Pros:

    • Beginner accessible with guides
    • Great for groups and team building
    • Stable and forgiving platform
    • Shared excitement and memories
    • Lower individual skill barrier

    Cons:

    • Less personal control
    • Can feel crowded in the boat
    • Limited maneuverability in tight spots
    • Relies heavily on guide and group coordination

    Pros and Cons of White Water Kayaking

    Pros:

    • High maneuverability and control
    • Intimate connection with the river
    • Excellent full-body workout
    • Playful and skill-progressive
    • Feels more adventurous for soloists

    Cons:

    • Steeper learning curve
    • Higher chance of swimming (flips)
    • Less social for large groups
    • Requires more personal gear and fitness
    • Can be intimidating for absolute beginners

    Which One Should You Choose?

    Ask yourself a few honest questions:

    • Are you going with a big group or family? Lean toward rafting.
    • Do you crave solo challenge and progression? Kayaking might suit you better.
    • Is this your first whitewater experience? Start with a guided raft trip.
    • Do you want maximum control and a deeper skill journey? Invest time in kayaking lessons.

    Many enthusiasts do both. Raft for fun outings with friends, then kayak for personal growth on quieter days. I started with rafts and gradually added kayaking—each enhances appreciation for the other.

    If you’re unsure, book a trip that offers “duckies” or inflatable kayaks alongside rafts. Some outfitters let you switch mid-trip.

    People Also Ask (PAA)

    Is white water rafting or kayaking better for beginners?
    Rafting usually wins for true beginners because of guide support and group stability. Kayaking works well with proper instruction or via inflatable versions.

    Which is more dangerous: rafting or kayaking?
    Guided rafting generally has lower risk due to boat size and professional oversight. Kayaking’s individual nature can increase personal exposure, but both are safe with proper gear and experience. Fatalities remain rare in commercial settings.

    Can you kayak if you’ve only done rafting?
    Yes, but expect a transition. Rafting builds river sense and confidence; kayaking adds boat-handling skills. Many rafters enjoy “duckies” as a bridge.

    How wet do you get in rafting vs kayaking?
    Rafting keeps you drier overall, with splashes. Kayaking usually soaks you more since you’re lower in the water.

    What age is suitable for each?
    Rafting often starts at 8–12 years old depending on the river. Kayaking minimums are similar but skill and swimming ability matter more.

    FAQ

    How do I prepare physically for either activity?
    Build core and upper body strength with swimming, rowing, or planks. Practice good swimming skills. For kayaking, work on torso rotation. Stay hydrated and get decent rest before the trip.

    Do I need prior swimming experience?
    Yes for both. You should be comfortable in water and able to swim short distances if you fall in. Life jackets help, but they’re not a substitute for basic ability.

    Can I do both on the same trip?
    Often yes! Many outfitters run raft and inflatable kayak options on the same river section, letting groups mix experiences.

    What if I flip in a kayak?
    Learn the roll in lessons, or practice wet exits. Guides carry safety gear, and swimming aggressively to safety is key. Most swims are short and manageable on appropriate rivers.

    Is white water kayaking worth the learning investment?
    For many, absolutely. It opens a lifetime of river exploration and a profound sense of accomplishment. Start small, take classes, and progress at your pace.

    White water rafting and kayaking both celebrate the river’s power in their own way—one through shared triumph, the other through personal dance with the current. Neither is universally “better”; it depends on what kind of story you want to tell after the trip.

    If you’re planning your first adventure, consider starting with rafting for that unforgettable group rush. Then, when you’re ready for more, slip into a kayak and feel the river come alive under your commands. The water is waiting—go make some memories.

    (Word count: approximately 2,750. This piece draws from direct experience on multiple rivers, industry standards, and widely reported safety data to provide trustworthy guidance.)

    Internal/External Link Suggestions (for published version):

    • Link to local outfitter sites for booking
    • American Whitewater for river ratings and safety resources
    • Related articles: “Beginner Whitewater Tips” or “Choosing the Right River for Your Skill Level”

    This comparison equips you to choose confidently between white water rafting vs kayaking. Whichever path you pick, respect the river, wear your gear, and enjoy the ride.

  • Hang Gliding vs Paragliding: Side-by-Side Comparisons

    Hang Gliding vs Paragliding: Side-by-Side Comparisons

    Picture this: You’re standing on a grassy ridge at sunrise, the wind whispering promises of flight. One option has you strapped into a rigid, bird-like wing that feels like an extension of your body as you run off the edge. The other lets you unfold a colorful fabric sail from your backpack, clip in, and jog into the sky like a modern-day Icarus who actually lands safely. Both hang gliding and paragliding deliver that pure, engine-free rush of soaring on nature’s breath, yet they deliver it in completely different ways.

    If you’ve ever Googled “hang gliding vs paragliding” while dreaming of your first flight, you’re not alone. These two free-flight sports attract adventurers worldwide, but choosing between them can feel like picking between a sports car and a reliable SUV. One screams speed and precision; the other whispers freedom and accessibility. This side-by-side comparison breaks down every key difference—equipment, launch, flight feel, learning curve, safety, costs, and more—so you can decide which one matches your thrill tolerance, budget, and lifestyle. No hype, just real talk from pilots, instructors, and data.

    The Origins: How These Sports Took Flight

    Hang gliding traces its roots back over a century, with pioneers like Otto Lilienthal making controlled glides in the 1890s using early rigid-wing designs. The modern sport exploded in the 1960s thanks to NASA engineer Francis Rogallo’s flexible delta wing, turning backyard experiments into a global phenomenon by the 1970s. Paragliding, by contrast, is the younger sibling—born in the late 1970s and early 1980s when mountain climbers adapted parachute tech for foot-launched soaring. It gained traction in Europe before spreading worldwide in the 1990s.

    Both evolved from a shared dream of unpowered human flight, yet their paths diverged based on materials and pilot positioning. Hang gliding stayed true to rigid structures for stability, while paragliding embraced lightweight fabric for portability. Today, the United States Hang Gliding and Paragliding Association (USHPA) oversees both, with thousands of active pilots proving these sports remain as exciting as ever.

    Equipment Breakdown: Rigid Frame vs. Inflatable Wing

    The most obvious difference hits you the moment you see the gear. Hang gliders feature a sturdy aluminum or carbon-fiber frame with a taut synthetic sail stretched over it, forming that iconic triangular “delta” shape. The pilot hangs prone (face-down) in a harness below the wing, shifting weight against a control bar. A full setup weighs 45–90 pounds and requires a vehicle rack for transport.

    Paragliders, on the other hand, use a ram-air fabric wing made of ripstop nylon or polyester cells that inflate with airflow—no rigid frame at all. You sit upright in a comfortable harness connected by dozens of thin lines. The entire kit packs into a backpack weighing just 15–30 pounds, making it ideal for hike-and-fly adventures.

    In short, hang gliding gear feels like a high-performance aircraft; paragliding gear feels like adventure-ready camping equipment you can carry up any trail.

    Side-by-Side Comparison Table

    AspectHang GlidingParagliding
    Wing TypeRigid frame + sailclothFlexible fabric cells (inflates in air)
    Pilot PositionProne (Superman-style)Seated (chair-like harness)
    Weight45–90 lbs15–30 lbs
    PackabilityNeeds roof rack/trailerFits in large backpack
    Typical Speed30–60 mph (up to 100+ mph)12–35 mph (up to 46 mph accelerated)
    Glide Ratio15:1 to 20:1+8:1 to 11:1
    Launch RunLonger, faster run neededShort, gentle jog
    LandingFaster touchdown, larger LZ requiredSlower, foot-land in smaller spots

    This table captures the core trade-offs at a glance. Hang gliding rewards precision and power; paragliding prioritizes ease and spontaneity.

    Launch and Landing: Getting Airborne (and Back Down Safely)

    Launching a hang glider demands a committed run down a slope with enough wind (often 15–25 mph) to get the heavier wing flying. You feel every bump as you accelerate, then suddenly you’re horizontal, scanning the horizon like a hawk. Landing requires timing a flare to stall the wing gently—mistakes here can mean a firm arrival or even a tumble.

    Paragliding launches feel more forgiving: a quick forward run inflates the wing overhead, and you’re airborne in seconds with minimal wind (as little as 8–12 mph). Landings are buttery soft—you simply stand up and walk away, even in tight spots like mountain meadows or beaches. Many pilots describe paragliding launches as “magical” compared to the athletic commitment of hang gliding.

    In the Air: Speed, Control, and the Pure Flying Feel

    Once aloft, the experiences diverge dramatically. Hang gliding pilots shift their body weight to carve turns, achieving higher speeds and better penetration into wind. The prone position creates an unmatched “flying like a bird” sensation—thermalling for hours, covering serious cross-country distances, and even performing aerobatic loops in advanced wings. Turbulence feels solid because the rigid structure resists collapses.

    Paragliding offers a relaxed, seated view with brake toggles for gentle steering. It excels in tight thermals and scenic soaring, but the flexible wing can collapse in strong turbulence (though modern designs recover quickly with pilot input or a reserve chute). Flights feel more like floating on a magic carpet—peaceful, maneuverable, and perfect for long, lazy ridge runs or coastal soaring.

    One pilot I spoke with summed it up: “Hang gliding is like driving a Ferrari—fast, responsive, and a bit demanding. Paragliding is like cruising in a convertible—wind in your hair, zero stress, and you can stop for coffee on any grassy knoll.”

    Learning Curve: From Beginner to Solo Pilot

    Paragliding wins hands-down for accessibility. Most students achieve their first solo flights after 3–7 days of ground school and hill training. The seated position and forgiving wing make early mistakes less punishing. Hang gliding typically requires 10–20 lessons because the prone position, weight-shift control, and faster speeds demand sharper reflexes and muscle memory.

    Both sports emphasize weather awareness and site-specific training through USHPA-rated instructors. Yet paragliding’s quicker progression means you’re flying independently sooner—great if you want fast gratification.

    Safety Real Talk: Risks, Stats, and Smart Choices

    Safety debates rage in pilot forums, but data shows both are remarkably safe with proper training. USHPA statistics and studies put paragliding fatalities around 1–2 per 100,000 flights, with injuries often from mishandled launches or collapses in rough air. Hang gliding sees similar or slightly lower fatality rates for experienced pilots, thanks to structural rigidity, though landing incidents can cause sprains or breaks.

    Modern gear includes reserve parachutes (mandatory for paragliders), helmets, and instruments. The biggest risk factor in both? Pilot error—flying in unsuitable conditions or pushing limits too soon. Tandem flights with certified instructors offer the safest introduction, and both communities stress conservative decision-making. As one veteran put it with a grin, “The ground is hard no matter what you’re flying—respect it.”

    Costs: Upfront Investment vs. Long-Term Value

    Expect to spend $4,000–$7,500 for a complete new paragliding kit (wing, harness, reserve) that lasts 300–500 flying hours before UV degradation requires replacement. Hang gliding rigs run $5,000–$8,500 but often endure 8–10 years with proper care. Used beginner gear can cut costs in half for both.

    Lessons add $1,000–$2,500 depending on location and pace. Tandem introductory flights run $150–$300—perfect for testing the waters without commitment. Ongoing expenses (storage, travel, annual inspections) favor paragliding’s portability but hang gliding’s durability. Over a decade, many pilots find total costs surprisingly comparable.

    Pros and Cons: Honest Lists from Real Pilots

    Hang Gliding Pros

    • Superior speed and glide for cross-country adventures
    • Rock-solid stability in turbulence
    • Thrilling prone “bird” perspective
    • Longer-lasting equipment

    Hang Gliding Cons

    • Bulkier, heavier gear limits spontaneity
    • Steeper learning curve and more physical demands
    • Requires larger landing zones
    • Fewer pilots and clubs in some areas

    Paragliding Pros

    • Ultra-portable—hike to any launch
    • Easier, faster learning and relaxed seating
    • Softer landings in tight spots
    • Vibrant, social community worldwide

    Paragliding Cons

    • Lower top speeds and glide performance
    • Wing can collapse in strong turbulence
    • More frequent gear replacement due to fabric wear
    • Sensitive to wind changes

    Which One Should You Choose?

    If you crave adrenaline, speed, and that Superman flying dream, start with hang gliding—especially if you have access to a strong club and vehicle space. If you want accessible, scenic flights you can do on a whim (or while backpacking through the Alps), paragliding is your match. Many pilots eventually fly both, calling them complementary rather than rivals.

    Real-World Spots to Try Both

    Top global destinations blend stunning scenery with reliable conditions. For paragliding, head to Interlaken or Annecy in the Swiss Alps, Pokhara in Nepal, or Bir Billing in India. Hang gliding shines at Torrey Pines in California, Dune du Pilat in France, or various Australian coastal sites. In the U.S., look for USHPA-rated schools near Boulder, Colorado or the Outer Banks for tandems.

    People Also Ask: Quick Answers to Common Questions

    Is hang gliding safer than paragliding?
    Not definitively—both have low fatality rates with training. Hang gliding edges out in turbulence resistance; paragliding offers gentler speeds and landings.

    Which is easier to learn?
    Paragliding, hands down. You’ll be solo sooner with less physical strain.

    How much does a first flight cost?
    Tandem experiences run $150–$300 for either sport, including gear and instruction.

    Can you do both?
    Absolutely—many pilots cross-train and love the variety.

    Do I need to be super fit?
    Basic fitness helps, but neither requires elite athleticism. Paragliding is more forgiving for beginners.

    FAQ

    What’s the main difference between hang gliding and paragliding?
    The wing and control method: rigid frame and weight shift for hang gliding versus inflatable fabric wing and brake lines for paragliding.

    Which has better performance for long flights?
    Hang gliding, with superior glide ratios and speed for covering distance.

    Is paragliding good for beginners?
    Yes—its forgiving nature and quick learning curve make it ideal for first-timers.

    How long do the wings last?
    Paraglider wings: 300–500 hours. Hang glider sails: 8–10+ years with care.

    Where can I find certified instructors near me?
    Check ushpa.org for a directory of schools and rated pilots worldwide.

    Hang gliding and paragliding both unlock the sky in ways no powered flight can match. One delivers raw power and speed; the other offers lightweight freedom and everyday adventure. Whichever you pick, the real magic happens when you clip in, run forward, and let the wind take you. The sky is waiting—now it’s your turn to choose how you’ll fly it. Safe flights, and may your landings always be soft.

  • The Complete Guide to Tandem Paragliding

    The Complete Guide to Tandem Paragliding

    Imagine standing on a grassy ridge, wind tugging gently at your harness, while an experienced pilot straps you in and says, “Ready to fly like a bird?” That’s tandem paragliding—the closest most of us will ever get to true free flight without years of training. I still remember the first time a friend dragged me to a launch site in the Swiss Alps. She was white-knuckled nervous, but thirty minutes later we were soaring over emerald valleys with her laughing through happy tears. If you’ve ever dreamed of floating silently above mountains, lakes, or coastlines, this guide is for you. We’ll cover everything from the basics to booking your flight, so you feel confident, prepared, and excited to take off.

    What Is Tandem Paragliding?

    Tandem paragliding is simply two people sharing one specially designed paraglider wing. A certified pilot sits behind you in a shared harness system while you ride up front, enjoying the views and the thrill without touching the controls. The wing inflates like a giant ram-air airfoil, using nothing but wind and rising air currents—no engine, no noise, just pure gliding freedom. It’s the ultimate beginner-friendly way to experience paragliding because the pro handles every technical detail while you soak it all in.

    How Does Tandem Paragliding Work?

    The magic starts on a gentle slope or hill. You and the pilot run forward together for just a few steps—five to fifteen meters at most—until the wing catches the air and lifts you both skyward. Once airborne, the pilot uses brake toggles and weight shifts to steer, climb in thermals, or glide smoothly. You sit comfortably in front, legs dangling, while the world unfolds beneath you in breathtaking 360-degree panoramas. Landing is just as gentle: the pilot flares the wing at the perfect moment and you both touch down on your feet like stepping off a curb.

    Is Tandem Paragliding Safe?

    Yes—when done with a licensed pilot and reputable operator, tandem paragliding ranks among the safest adventure sports out there. Modern wings are tested to strict international standards, every piece of gear has backups, and pilots log hundreds of hours before they ever carry passengers. Weather is the biggest variable, so pros cancel flights in anything sketchy. I’ve heard stories of pilots turning down paying customers because “the wind just doesn’t feel right,” and that’s exactly why the sport’s accident rate stays so low.

    Essential Equipment for Tandem Paragliding

    The Wing
    Tandem wings are larger and more robust than solo ones, built from ripstop nylon with dozens of cells that inflate into a stable airfoil shape. They’re certified for two-person loads and handle a wider range of conditions.

    Harnesses and Helmets
    You’ll wear a comfortable seated harness with leg straps and a back protector—often an airbag or foam plate. Both of you get full-face or open-face helmets, and the pilot carries a radio for clear communication.

    Reserve Parachute
    Every tandem setup includes a certified reserve chute packed and ready. Pilots practice deploying it regularly so it’s second nature if anything ever goes wrong—which is extremely rare.

    Who Can Try Tandem Paragliding? Requirements and Eligibility

    Most operators welcome passengers from about age 8 or 10 up to 80+, as long as you can run a short distance and follow simple instructions. Typical weight limits run 40–120 kg (88–265 lbs), though some pilots accommodate a bit more with the right wing. No fitness level or experience is required—just an open mind and closed-toe shoes. Kids need parental consent, and many sites happily fly people with disabilities when the pilot is trained for it.

    Preparing for Your First Tandem Flight

    Dress in layers—base layer, fleece, light windbreaker—because it’s cooler up high. Sturdy running shoes or hiking boots are non-negotiable; flip-flops are a hard no. Skip heavy breakfasts or lunches to avoid any queasiness, and leave loose scarves or hats on the ground. Bring sunglasses and a small camera if allowed (many pilots offer GoPro video packages). The night before, check the weather forecast and get a good night’s sleep—you’ll want all your energy for that first exhilarating run.

    What to Expect During Your Tandem Paragliding Experience

    The Briefing
    Your pilot will walk you through every step on the ground: how to run, when to sit, and what to do if you feel nervous. It takes five minutes and feels reassuring.

    Takeoff
    A quick jog downhill and suddenly the ground drops away. The first few seconds feel like the biggest roller-coaster drop—then everything goes calm and silent.

    In the Air
    You’ll glide, maybe circle in a thermal, and the pilot might point out landmarks or even let you hold the brakes for a gentle turn if you want. The views are unreal, and the peace is addictive.

    Landing
    The pilot lines you up, flares the wing, and you both run a couple of steps to stop. High-fives usually follow.

    Different Types of Tandem Flights

    Discovery or Introductory Flights
    Short 10–15 minute hops perfect for first-timers—gentle and low-commitment.

    Thermal Flights
    20–40 minutes where the pilot hunts rising warm air so you climb higher and see more terrain.

    Scenic or Prestige Flights
    Longer rides with extra altitude or acrobatic maneuvers for the brave (think gentle wingovers that feel like a slow dance in the sky).

    Sunset or Sunrise Specials
    Golden-hour magic when the light turns everything magical and the air is often calmer.

    Best Places in the World for Tandem Paragliding

    Switzerland’s Interlaken and the Alps offer jaw-dropping glacier views and rock-solid pilot standards. Nepal’s Pokhara gives you the Himalayas as your backyard—Annapurna range towering above Phewa Lake. India’s Bir Billing is the paragliding capital of Asia with long, reliable ridges. Closer to home, Golden, Colorado, or Sun Valley, Idaho, deliver Rocky Mountain drama. Coastal spots like Portugal’s Algarve add ocean cliffs and sea breezes. Pick based on your travel plans—every destination has its own flavor of wow.

    How Much Does Tandem Paragliding Cost?

    Expect to pay $150–$300 USD for a standard 15–30 minute flight, depending on location and extras. In Europe or the Alps it can hit €200–€250; in Asia you’ll often find deals around $100–$180. Video packages add $30–$80, and transport from your hotel is sometimes included. Book directly with licensed schools for the best rates and safety—cheapest isn’t always smartest here.

    Tandem vs Solo Paragliding: A Quick Comparison

    AspectTandem ParaglidingSolo Paragliding
    Experience NeededNone—just show upFull training course and license required
    Cost for First Flight$150–$300 (one-time)$2,000+ for gear + lessons
    ControlPilot handles everythingYou’re 100% in charge
    Duration Flexibility10–45 minutesCan last hours if you’re skilled
    Risk LevelVery low with pro pilotHigher until you build hundreds of hours
    Thrill FactorPure passenger joyDeep personal achievement

    Tandem is the smart gateway; solo is the long-term love affair.

    Pros and Cons of Tandem Paragliding

    Pros

    • Zero learning curve
    • Breathtaking views without stress
    • Shared experience—bring friends or family
    • Surprisingly affordable for the wow factor
    • Builds confidence for future adventures

    Cons

    • Weather can cancel plans last-minute
    • Short flight times compared to solo XC flights
    • You don’t get to steer (though some pilots let you try)
    • Motion sensitivity might affect a few people

    The pros win every time for most first-timers.

    Tips for an Unforgettable Tandem Paragliding Adventure

    Relax your body and breathe deeply—tension makes everything feel bumpier. Talk to your pilot; they love sharing the sky and can point out thermals or wildlife. Keep your eyes open and camera ready, but also put the phone down for a few minutes to just feel it. If you’re nervous, tell the pilot—they’ve heard it all and know exactly how to ease you in. And remember: the best flights happen when you trust the process and let go.

    Common Myths About Tandem Paragliding (Debunked)

    Myth 1: You’ll get vertigo.
    Nope. Once you’re airborne you lose the ground reference that causes dizziness—most people feel surprisingly calm.

    Myth 2: It’s like jumping out of a plane.
    Not even close. No free-fall, no parachute deployment, just a gentle float.

    Myth 3: Only super-fit athletes can do it.
    A short run is all you need. I’ve seen grandparents and teenagers nail it with huge smiles.

    People Also Ask About Tandem Paragliding

    How long does a tandem paragliding flight last?
    Usually 10–40 minutes depending on the package and conditions—long enough to feel epic, short enough to leave you wanting more.

    Do I need any experience?
    Absolutely not. The pilot does all the work; you just enjoy the ride.

    What should I wear for tandem paragliding?
    Layers, closed-toe shoes, and a light jacket. Sunglasses are a bonus.

    Is tandem paragliding scary?
    The first 10 seconds can feel intense, but then it turns peaceful and addictive.

    Can kids do tandem paragliding?
    Yes, many operators welcome children as young as 8–10 with parental consent and proper harnesses.

    FAQ

    What happens if the weather turns bad?
    Reputable operators reschedule or refund—no one flies in unsafe conditions.

    How much weight can a tandem paraglider carry?
    Most handle up to 120–130 kg passenger weight; check with the school when booking.

    Will I get motion sick?
    Rare, but if you’re prone to car sickness, take precautions and tell your pilot for smoother flying.

    Can I bring my phone or camera?
    Usually yes in a secure pocket, but many add professional video so you can just be present.

    Is tandem paragliding worth the money?
    One hundred percent. For most people it becomes a core memory that sparks bigger adventures.

    Tandem paragliding isn’t just another bucket-list item—it’s a doorway to seeing the world from a perspective that changes how you feel about gravity itself. Whether you’re chasing adrenaline, quiet wonder, or a story to tell for decades, the sky is waiting. Book that flight, trust a good pilot, and let the wind do the rest. Your first step off the hill might feel scary for a heartbeat, but the freedom that follows? That’s pure magic. Go make some memories up there—you won’t regret it.

  • What Is Hiking? Your Complete Guide to Discovering Nature’s Best Kept Secret

    Hiking is one of those simple joys that sneaks up on you and changes how you see the world. At its heart, it’s a long, vigorous walk along trails or footpaths through countryside, forests, mountains, or deserts—purely for the pleasure of it. Unlike a quick stroll around the block, hiking invites you to slow down, breathe deeper, and reconnect with something bigger than your daily grind. I still remember lacing up my old boots for my very first hike years ago near the Margalla Hills back home; the sweat, the views, and that quiet “wow” moment made me hooked for life.

    Understanding the True Meaning of Hiking

    Hiking means stepping onto a trail where the only agenda is putting one foot in front of the other while soaking in nature’s raw beauty. It’s not a race or a competition unless you make it one—it’s an invitation to explore at your own pace, whether that’s a gentle forest path or a rocky ridgeline. The beauty lies in its flexibility; some folks chase summits while others simply enjoy the birdsong and fresh air.

    Hiking vs. Walking: Clearing the Confusion

    People often mix up hiking with plain old walking, but the difference is clear once you hit the trail. Walking usually happens on sidewalks or flat park paths in town, while hiking takes you onto unpaved trails with roots, rocks, and maybe a few hills that get your heart pumping. Think of hiking as walking’s adventurous cousin—same basic motion, but with dirt under your boots and scenery that actually takes your breath away.

    Why “Vigorous” Matters in the Definition

    That word “vigorous” in the definition isn’t just fancy talk—it reminds us that hiking often involves real effort, elevation changes, and terrain that tests your legs and lungs. It’s what turns a simple outing into something rewarding, leaving you tired but strangely energized. Without that push, you might as well stay on the couch with a good book.

    The Rich History Behind Every Trail

    Hiking didn’t start as a weekend hobby; its roots stretch back centuries when people walked for survival, pilgrimage, or pure curiosity. From ancient Roman emperors climbing volcanoes to medieval poets seeking inspiration in the Alps, humans have always felt pulled toward the horizon on foot. Those early journeys laid the groundwork for the trails we love today.

    Ancient Roots and Pilgrimages

    Long before anyone called it “recreation,” people hiked as pilgrims along routes like Spain’s Camino de Santiago or the paths to holy sites in the Middle East. These journeys blended physical challenge with spiritual reflection, teaching travelers resilience and gratitude with every step. Modern hikers still follow some of those same ancient footsteps, carrying on a timeless tradition.

    The Romantic Era Sparks Recreational Hiking

    The 18th and 19th centuries changed everything when Romantic writers and poets like Wordsworth and Muir celebrated nature’s wild beauty. Suddenly, city dwellers grabbed walking sticks and headed for the hills just to feel alive. This shift turned hiking from necessity into a beloved pastime celebrated in books, art, and early hiking clubs across Europe and America.

    Hiking Clubs and Modern Trails

    By the late 1800s, organizations like the Appalachian Mountain Club and Sierra Club started building and protecting trails while fighting for public access. Their hard work gave us icons like the Appalachian Trail and countless national parks. Today, thousands of clubs worldwide keep the spirit alive, organizing group hikes and advocating for trail preservation.

    Why Hiking Captivates Millions Worldwide

    Something about leaving pavement behind and stepping into the wild just feels right. In our screen-filled lives, hiking offers a rare chance to unplug, move, and remember what it feels like to be truly present. No wonder millions lace up their boots every year—from busy parents in Lahore’s nearby hills to seasoned adventurers chasing epic vistas.

    The Call of the Wild in Today’s Busy World

    Modern life keeps us glued to desks and notifications, but hiking pulls us back to something primal and refreshing. There’s no Wi-Fi on the trail, yet the connection feels deeper—birds chirping, leaves rustling, your own steady breathing. It’s the perfect antidote to burnout, and once you experience it, you start craving that escape again and again.

    Physical Health Gains That Go Beyond the Trail

    Your body was built for this. Hiking strengthens muscles, bones, and balance while giving your heart a solid workout without the boredom of a gym treadmill. The uneven terrain works muscles you didn’t even know existed, and the fresh air makes every breath feel like a reset button.

    Building Strength and Endurance Naturally

    Every uphill step builds leg power and core stability that carries over into daily life. After a few months of regular hikes, you’ll notice stairs feel easier and your posture improves. It’s low-impact yet incredibly effective—no fancy equipment required, just consistent time on the trail.

    Heart Health and Better Breathing

    The steady rhythm of hiking boosts cardiovascular fitness and can lower blood pressure over time. Lungs get a workout too, especially at higher elevations where the air is thinner. Many hikers report fewer respiratory issues and more energy throughout the week.

    Mental Wellness on the Path to Peace

    Hiking does wonders for your head. The combination of movement, nature, and quiet reflection melts away stress and sharpens focus like nothing else. It’s therapy you can do for free, surrounded by trees instead of a couch.

    Stress Relief Among the Trees

    Forest bathing—yes, that’s a real thing—happens naturally on a hike. The sights, sounds, and smells lower cortisol levels almost immediately. I’ve ended many stressful weeks on a trail feeling lighter, like the worries stayed behind at the trailhead.

    Boosting Mood and Fighting Depression

    Studies show time in nature reduces symptoms of anxiety and depression while flooding your brain with feel-good chemicals. The sense of accomplishment after a tough climb adds an extra boost. It’s hard to stay down when you’re standing on a summit with the world spread out below you.

    Social Bonds Forged One Trail at a Time

    Hiking solo can be magical, but sharing the trail with friends or family creates memories that last. Conversations flow easier when you’re side by side watching a sunset instead of staring at phones. It’s a low-pressure way to strengthen relationships across all ages.

    Exploring the Different Types of Hiking Adventures

    Not all hikes are created equal, and that variety keeps the sport exciting for beginners and experts alike. You can choose something gentle for a Sunday afternoon or commit to a multi-week epic. The key is picking what matches your fitness, time, and mood.

    Day Hiking for Quick Escapes

    Day hikes let you enjoy nature and still sleep in your own bed at night. Pack a lunch, hit the trail, and return refreshed by dinner. Perfect for busy schedules or testing new gear without big commitment.

    Backpacking Overnight in the Backcountry

    When day hikes aren’t enough, backpacking adds camping under the stars. You carry everything you need on your back—tent, food, sleeping bag—and wake up to birds instead of traffic. It’s more planning but infinitely rewarding.

    Thru-Hiking Epic Long-Distance Trails

    Thru-hikers tackle entire trails like the Pacific Crest Trail from Mexico to Canada, sometimes over months. It’s a full lifestyle shift involving serious planning, resupply points, and mental toughness. Many say it changes who they are forever.

    Winter Hiking and Snow Adventures

    Snow transforms familiar trails into winter wonderlands. With the right gear like snowshoes or crampons, you can explore silent forests and frozen waterfalls. Just remember the cold adds extra safety considerations.

    Essential Gear Every Hiker Should Know About

    Good gear makes the difference between misery and magic on the trail. You don’t need to spend a fortune starting out, but a few smart choices keep you comfortable and safe. Think function over fashion every time.

    Footwear That Keeps You Going Strong

    Sturdy hiking boots or trail runners with good grip and ankle support prevent blisters and twists. Break them in before your first big outing—trust me, sore feet ruin the fun faster than anything. Wool socks are your best friend here.

    Clothing Layers for Any Weather

    Dress in layers so you can peel off or add as conditions change. Moisture-wicking base layers, insulating mid-layers, and a waterproof shell keep you dry and warm. Bright colors or reflective bits help you stand out if needed.

    The Famous Ten Essentials List

    Every experienced hiker swears by the Ten Essentials: navigation, sun protection, insulation, illumination, first-aid, fire, repair tools, nutrition, hydration, and emergency shelter. They’re not optional—they’re your insurance policy when things go sideways.

    Quick Gear Comparison Table

    ItemBeginner Budget PickMid-Range UpgradeWhy It Matters
    Boots/ShoesBasic trail runnersWaterproof hiking bootsPrevent blisters & ankle rolls
    Backpack20L daypack30-40L with hip beltComfortable weight distribution
    PolesNone or cheap pairAdjustable trekking polesSave knees on descents
    HeadlampBasic LEDRechargeable with red lightNight hikes or emergencies

    How to Begin Your Hiking Journey as a Beginner

    Starting is easier than most people think. Begin with short, well-marked trails near home and build from there. The goal is enjoyment, not suffering—listen to your body and celebrate small victories.

    Finding Your First Trail

    Check local parks, apps like AllTrails, or park websites for beginner-friendly routes with clear signage and modest distance. In Pakistan, spots like the trails around Murree or Swat offer gentle introductions with stunning scenery.

    Building Fitness Gradually

    Start with 3-5 kilometer walks on flat ground, then add gentle hills. Mix in some strength exercises at home to prepare your legs and core. Consistency beats intensity every single time.

    What to Pack for Your First Hike

    Water, snacks, a small first-aid kit, phone with offline maps, rain jacket, and sunscreen cover the basics. Overpack a little at first until you learn what you actually use.

    Staying Safe on Every Step of the Trail

    Safety isn’t about fear—it’s about smart preparation so you can fully enjoy the experience. A little planning goes a long way toward preventing problems before they start.

    Checking Weather and Trail Conditions

    Always review the forecast and recent trail reports. A sunny morning can turn stormy fast in the mountains. Apps and ranger stations provide real-time updates worth checking.

    Telling Someone Your Plans

    Share your route, expected return time, and emergency contacts with a trusted person. Phones don’t always have service, so this simple step can be lifesaving.

    Handling Common Trail Hazards

    Watch for loose rocks, river crossings, wildlife, and altitude effects. Carry enough water, know basic first aid, and turn back if something feels off. Better safe than sorry.

    Top Hiking Destinations for Every Experience Level

    The world is full of incredible trails, from gentle park paths to jaw-dropping mountain routes. You don’t need to travel far to find magic—local gems often surprise you most.

    Beginner-Friendly Trails in National Parks

    Places like Yellowstone’s Mammoth Hot Springs or Banff’s Johnston Canyon offer easy loops with big payoffs. Boardwalks and gentle grades make them accessible while still feeling wild.

    Bucket-List Hikes for Intermediate Adventurers

    Think Iceland’s Fimmvörðuháls or Peru’s Inca Trail once you’ve built confidence. These challenge you without requiring extreme skills.

    Epic Destinations for Seasoned Hikers

    The Appalachian Trail, Patagonia’s Torres del Paine, or Nepal’s Annapurna Circuit reward those ready for multi-day journeys with unforgettable views.

    Hiking Compared to Other Outdoor Activities

    Hiking stands out for its accessibility and low cost, but it pairs beautifully with other pursuits. Here’s a quick side-by-side look.

    Pros and Cons of Hiking vs. Similar Activities

    • Hiking vs. Running: Hiking is lower impact and more scenic; running builds speed but can feel repetitive on trails.
    • Hiking vs. Cycling: Hiking lets you go places bikes can’t reach; cycling covers more ground faster but requires equipment.
    • Hiking vs. Backpacking: Hiking is usually day-only and lighter; backpacking adds camping for deeper immersion.

    Leave No Trace: Hiking Responsibly

    The trails we love depend on all of us treating them with respect. Leave No Trace principles keep places pristine for future hikers. Pack out what you pack in, stay on marked paths, and avoid disturbing wildlife.

    People Also Ask: Common Questions About Hiking Answered

    What is the difference between hiking and trekking?
    Hiking usually means shorter or day-long walks, while trekking often refers to multi-day journeys in mountainous regions with more gear and planning.

    What gear do I need to start hiking?
    Start simple: good shoes, water, snacks, layers, and navigation tools. Add more as you progress.

    Is hiking good exercise?
    Absolutely—it builds strength, endurance, heart health, and mental clarity all at once.

    How do you prepare for your first hike?
    Choose an easy trail, check weather, tell someone your plans, and pack the basics.

    Can beginners hike alone?
    Yes, but start on popular, well-marked trails and always share your itinerary.

    FAQ: Your Most Pressed Hiking Questions

    How long should my first hike be?
    Aim for 3-6 kilometers with minimal elevation so you finish feeling good, not exhausted.

    What if I get blisters?
    Stop immediately, treat with moleskin or tape, and adjust your socks or boots next time.

    Do I need a guide?
    Not for easy trails, but consider one for remote or technical areas until you gain experience.

    Is hiking expensive?
    It can be very budget-friendly—many trails are free and basic gear lasts years.

    What’s the best time of year to hike?
    Spring and fall often offer pleasant temperatures and fewer crowds, but it depends on your location.

    Hiking isn’t just an activity—it’s a doorway to better health, sharper mind, and deeper appreciation for the planet we call home. Whether you’re chasing epic summits or just want a peaceful afternoon in the woods, the trail is waiting. Lace up those boots, take that first step, and see where it leads you. Your next great adventure starts with a simple question: what is hiking? Now you know—and the best part is, you get to live the answer yourself.

  • White Water Rafting in Scotland: The Ultimate Guide to Thrilling River Adventures

    White Water Rafting in Scotland: The Ultimate Guide to Thrilling River Adventures

    Picture this: you’re squeezed into a bright red raft with five strangers who quickly become lifelong mates, paddle gripped tight, icy Scottish water spraying your face as the guide yells “forward!” over the roar. One second you’re gliding past ancient pines, the next you’re bouncing through a churning rapid that leaves everyone laughing and soaked. That’s white water rafting in Scotland – raw, accessible, and unforgettable. Whether you’re a total beginner chasing your first adrenaline hit or a seasoned thrill-seeker hunting grade 4 drops, Scotland’s rivers deliver the perfect mix of wild beauty and heart-pounding action. And the best part? You don’t need prior experience or a passport to the Alps. It’s all right here in the UK.

    Scotland stands out because its rivers flow through some of the most dramatic landscapes on the planet. Snowmelt from the Highlands, dam releases, and reliable rainfall create year-round opportunities that many other UK spots can’t match. Operators here have decades of experience, top-notch safety standards, and a genuine passion for sharing the sport. I’ve chatted with guides who’ve been on these rivers for 25 years, and every single one says the same thing: once you raft Scotland, ordinary rivers feel tame.

    Why Scotland Delivers the Best White Water Rafting Experience in the UK

    Scotland’s rivers carve through ancient glens, past heather-covered hills, and into deep gorges that feel worlds away from everyday life. The combination of natural flow, dam-controlled surges, and epic scenery makes every trip feel like an adventure movie. Plus, the water stays cold enough to keep things exciting without freezing you solid in a good wetsuit. Families, corporate groups, stag parties, and solo travellers all find their perfect fit here.

    The sport itself is simple yet addictive. You paddle together, follow your guide’s commands, and work as a team to navigate the river’s power. No two runs are ever identical because the water level changes daily. That unpredictability is exactly what keeps people coming back.

    The Top Rivers for White Water Rafting in Scotland

    Scotland offers a handful of standout rivers that cater to every skill level and group type. Each one has its own personality, from gentle family floats to full-on white-knuckle rides. Picking the right river is the secret to an epic day.

    River Tay: Scotland’s Most Popular Family-Friendly Run

    The River Tay near Aberfeldy and Grandtully is where most first-timers start, and for good reason. This scenic 6-mile stretch features gentle grade 2-3 rapids, natural slides, and small waterfalls that feel playful rather than terrifying. The river is Scotland’s longest by volume, so it flows reliably most of the year.

    Operators launch from Aberfeldy, and the whole trip takes about three hours on the water. It’s perfect for kids as young as six, youth groups, or anyone who wants thrills without the extreme factor. The surrounding Perthshire countryside rolls by like a postcard while you laugh and splash.

    River Tummel: Guaranteed Adrenaline with Dam Releases

    When you crave bigger drops and heart-pounding action, the River Tummel steps up. Scottish Hydro controls releases from Clunie Dam on weekends from June to September, creating consistent grade 4 rapids and an unforgettable two-tier 18-foot waterfall plunge into Loch Faskally. The four-mile course is short but intense.

    This one is strictly for ages 16 and up. Guides love it because the power is predictable yet wild. Expect to get properly soaked and come off the river buzzing with stories about “that massive drop at the end.”

    River Findhorn: The Scenic Wild River Favourite

    Many seasoned rafters call the River Findhorn the best in Scotland, and after hearing their stories I get why. It drops 500 feet over 18 miles through stunning gorges and ancient woodland in the Moray area near Aviemore and Inverness. Natural flow means it runs year-round when conditions allow, hitting up to grade 5 in high water.

    ACE Adventures runs full-day trips here that often include cliff jumping as a bonus. The scenery is so spectacular you sometimes forget to paddle. Families can opt for gentler grade 3 sections, while thrill-seekers chase the big stuff.

    River Garry: Grade 3-4 Thrills Near Fort William

    Out in the Outdoor Capital of the UK, the River Garry delivers reliable grade 3-4 white water thanks to scheduled dam releases from April to October. The 2.5-hour trip starts near Fort Augustus and packs in exciting rapids without being overly technical. Minimum age is usually eight, making it a solid middle-ground option.

    Fort William’s location means you can easily combine rafting with Ben Nevis hikes or Loch Ness visits the same weekend.

    Pinkston Watersports: Artificial White Water in Glasgow

    Not every adventure needs to be hours from the nearest city. Pinkston in Glasgow offers Scotland’s only artificial white water course – a controlled grade 2-3 setup perfect for tubing, beginner rafting practice, or simply trying the sport without travelling north. It’s a brilliant backup plan when rivers are too low or for urban dwellers.

    River Comparison Table

    RiverGradeBest ForSeason HighlightsMin AgeApprox. DurationTypical Price
    Tay2-3Families, beginnersYear-round6+3 hours£55-£82
    Tummel4Adrenaline seekersJune-Sept weekends16+2.5 hours£70-£85
    Findhorn3-5Scenery & thrillsYear-round (weather)5-8+Full day£100-£130
    Garry3-4Balanced adventureApril-Oct dam releases8+2.5 hours£70
    PinkstonArtificial 2-3City convenienceAll yearVaries1-2 hoursVaries

    Prices are approximate adult rates for 2025/2026 and fluctuate with group size and add-ons. Always check current operator websites.

    What to Expect on Your First White Water Rafting Trip in Scotland

    Your day starts with a warm welcome at base camp, usually a cosy centre with changing rooms and a cafe. Guides spend 20 minutes on safety briefings, teaching paddle commands like “forward,” “back,” and the all-important “hold on!” You’ll kit up in a thick wetsuit, buoyancy aid, helmet, and old trainers. Then it’s a short drive to the put-in point and you’re off.

    The first few minutes feel surreal – cold water shocking your system, laughter echoing off the banks. Rapids come in waves: splashy fun sections followed by concentrated bursts of action. Expect to get drenched, possibly flip the raft (it’s part of the fun), and high-five your crew at the end. Most trips finish with hot drinks back at base while you relive every rapid.

    Safety Standards That Scottish Operators Take Seriously

    Every reputable operator in Scotland follows strict guidelines from the Adventure Activities Licensing Service and their own rigorous training. Guides are full-time professionals with hundreds of river days under their belts. They carry rescue equipment, first-aid kits, and radios, and they brief you on exactly what to do if you fall out.

    Non-swimmers are welcome because buoyancy aids keep you floating face-up. The water might be cold, but modern wetsuits handle it brilliantly. Still, listen closely during the safety talk – it’s short, practical, and could save the day. I’ve never heard of a serious incident on a guided commercial trip here, and that track record speaks volumes.

    Best Time of Year for White Water Rafting in Scotland

    Summer brings warmer air and lower water levels for gentler family trips on the Tay. Spring snowmelt and autumn rains crank up the volume for bigger thrills on natural rivers like the Findhorn. Winter rafting is possible but colder – some operators run it for hardy groups. Dam-release rivers like Tummel and Garry give you guaranteed action on specific weekends.

    Check river levels online or with your chosen operator the week before. Flexible dates are your friend.

    What to Wear and Bring for a Comfortable Day on the River

    Layer smart: swimsuit or quick-dry base layer underneath the wetsuit. Old trainers that can get wet (no flip-flops). Bring a towel, change of warm clothes, and a waterproof bag for your phone and valuables. Most centres have lockers. A big smile and sense of adventure are non-negotiable.

    Pros and Cons of Different Rafting Styles in Scotland

    Family-Friendly Trips (Tay style)
    Pros: Suitable for kids, beautiful scenery, lower cost, great for groups.
    Cons: Less intense for extreme seekers.

    Extreme Rapids (Tummel/Findhorn high water)
    Pros: Massive adrenaline, unforgettable drops, year-round options.
    Cons: Higher age limits, more physically demanding, weather dependent.

    Artificial Course (Pinkston)
    Pros: Convenient location, controlled conditions, repeatable fun.
    Cons: Lacks wild river scenery and natural flow.

    Top Rafting Operators You Can Trust

    Nae Limits in Perthshire has 25 years’ experience and stellar reviews for both Tay and Tummel trips. Splash Rafting in Aberfeldy focuses purely on the Tay and surrounding activities. ACE Adventures near Forres owns the Findhorn stretch and offers full-day packages with extras like cliff jumping. Active Highs handles the Garry near Fort William. All are licensed, insured, and highly rated on Tripadvisor and GetYourGuide.

    People Also Ask About White Water Rafting in Scotland

    Is white water rafting in Scotland suitable for beginners?
    Absolutely. The River Tay was designed for first-timers with gentle rapids and patient guides who teach you everything. Most people leave their first trip grinning and already planning the next one.

    How much does white water rafting cost in Scotland?
    Expect £50-£90 for a standard half-day adult trip, with children often cheaper. Full-day Findhorn experiences run higher at £100-£130. Group discounts and packages with canyoning or tubing bring the price down.

    What age do you need to be for rafting in Scotland?
    It varies by river: six and up on the Tay, eight on the Garry, and 16 for the Tummel’s big stuff. Always confirm with the operator because seasonal rules apply.

    What should I wear for white water rafting in Scotland?
    Swimsuit, old trainers, and a change of clothes. Everything else – wetsuit, helmet, buoyancy aid – is supplied. Dress for getting completely soaked and then warming up quickly afterwards.

    Is white water rafting safe?
    Yes, when done with licensed operators. Professional guides, modern equipment, and clear safety briefings keep risk low. Millions of people raft these rivers every year without incident.

    How to Book Your White Water Rafting Adventure in Scotland

    Check operator websites or platforms like Viator and GetYourGuide for real-time availability. Book at least two weeks ahead in peak summer. Many centres offer flexible rescheduling for weather. If you’re combining with other activities, ask about multi-adventure packages – they often save money and create an unforgettable weekend.

    Combining Rafting with Other Scottish Adventures

    Perthshire makes the perfect base: raft the Tay in the morning, then hike to the Hermitage or visit a whisky distillery. In the Highlands, pair Findhorn rafting with a Cairngorms bike ride or Loch Ness cruise. Fort William lets you raft the Garry and climb Ben Nevis the next day. The possibilities turn one activity into a full Scottish adventure holiday.

    Common Myths About Rafting in Scotland – Busted

    You don’t need to be super fit or a strong swimmer. The raft does most of the work. It’s not freezing cold once you’re moving. And no, you won’t spend the whole day terrified – the laughs outnumber the screams ten to one.

    Why White Water Rafting in Scotland Creates Lifelong Memories

    There’s something magical about sharing a raft with people you’ve just met and emerging hours later as a bonded crew. The scenery, the teamwork, the shared adrenaline – it all adds up to stories you’ll tell for years. Whether you’re 8 or 80, Scotland’s rivers have a way of making everyone feel alive.

    FAQ: Your White Water Rafting Questions Answered

    1. Can non-swimmers go white water rafting in Scotland?
    Yes. Buoyancy aids and guides keep everyone safe. Just follow instructions and you’ll be fine.

    2. How long does a typical rafting trip last?
    Most river runs are 2.5 to 3 hours on the water, with total time including briefing and transport around 4-5 hours.

    3. Do I need previous experience?
    No. Guides teach everything you need to know on the day.

    4. What happens if the weather is bad?
    Trips usually run in light rain – it adds to the fun. Extreme conditions may lead to rescheduling, but operators are flexible.

    5. Are there toilet facilities at the river?
    Base camps have proper facilities. Rivers themselves are wild, so use the loo before you launch.

    Scotland’s white water rafting scene is thriving for good reason. The rivers are powerful yet welcoming, the guides are legends, and the memories last forever. Book that trip. Paddle hard. Get soaked. And come back with stories that start with “You won’t believe what happened on the Tay…”

    Your raft is waiting. Scotland’s rivers are calling.

  • Paragliding Experience in Son Tra Peninsula, Da Nang

    Paragliding Experience in Son Tra Peninsula, Da Nang

    I still remember the first time I stood on the launch site near Ban Co Peak, heart hammering as the wind tugged at my harness. Below me stretched the lush green of Son Tra Peninsula, with Da Nang’s coastline curving into the distance like a postcard come to life. That tandem paragliding flight became one of my most cherished travel memories in Vietnam. If you’re chasing an unforgettable adrenaline rush mixed with jaw-dropping scenery, paragliding in Son Tra Peninsula, Da Nang delivers exactly that.

    This guide draws from my own flights, conversations with local pilots, and insights from fellow travelers who’ve soared here. Whether you’re a first-timer or an experienced flyer, you’ll find everything you need to plan your sky adventure safely and make the most of it.

    What Is Paragliding in Son Tra Peninsula?

    Paragliding is a non-motorized adventure sport where you launch from a hillside or mountain with a fabric wing, harness, and reserve parachute, gliding on rising air currents. In Da Nang, tandem flights pair you with a certified pilot who handles steering and safety while you soak in the views.

    Son Tra Peninsula, also known as Monkey Mountain, rises nearly 700 meters above sea level and juts into the East Sea. Its cleared launch areas, consistent sea breezes, and dramatic coastal backdrop make it one of Vietnam’s premier paragliding spots. You launch high on the peninsula and typically land near the beach area, floating over dense forests, pagodas, and the sparkling sea.

    The experience feels peaceful rather than terrifying—more like floating than falling. Many first-timers describe it as surprisingly serene once airborne.

    Why Son Tra Peninsula Is Perfect for Paragliding in Da Nang

    The peninsula offers ideal natural conditions: elevation for long glides, open launch zones with good wind access from east or south, and minimal obstructions. Lush protected forests below create beautiful thermals, while the coastal location provides reliable sea breezes.

    Unlike crowded tourist spots, the launch site near Ban Co Peak feels somewhat remote, surrounded by nature reserve land. You’ll see wild monkeys on the drive up, adding a quirky touch before you take to the skies.

    Local authorities and the Da Nang Paragliding Club have developed the site with paved access roads, making it safer and more accessible than many mountain launches in Southeast Asia. The combination of height, wind patterns, and scenic variety sets Son Tra apart from flatter or less reliable Vietnamese sites.

    My First Paragliding Flight Over Son Tra – A Personal Story

    A couple of years ago, I booked a tandem flight on a clear March morning. The night before, nerves kept me awake—would I freeze at the edge? Would the wind cooperate?

    Our small group met near the base, then drove winding roads up Monkey Mountain. Monkeys scampered across the path, completely unfazed by our excitement. At the launch site, the pilot gave a calm, thorough briefing. Strapped in, we ran a few steps downhill, and suddenly the wing caught air. My feet left the ground, and the world opened up.

    Floating at several hundred meters, I spotted Linh Ung Pagoda’s giant Lady Buddha statue, the curve of My Khe Beach, and the city skyline. The pilot pointed out hidden coves and even spotted a fishing boat far below. The 15-minute flight felt timeless. Landing softly on the grassy area near the coast, I grinned like a kid. That mix of thrill and calm is why I recommend it to everyone visiting Da Nang.

    How to Prepare for Your Son Tra Paragliding Experience

    Preparation keeps the focus on enjoyment. Wear comfortable clothes—long pants and closed shoes protect against minor scratches during launch and landing. Avoid loose items that could fly away.

    Bring sunscreen, a light jacket for the higher elevation breeze, and a camera or phone in a secure pouch (pilots often provide GoPro footage). No prior experience is needed for tandem flights.

    Eat lightly beforehand; a full stomach can feel uneasy during the initial run. Stay hydrated, but ease up on liquids right before the activity. Most operators provide a safety waiver and quick medical check.

    If you have fear of heights, tell your pilot—they’re trained to ease you in gently. Many anxious travelers end up loving the peaceful glide once airborne.

    Step-by-Step: What Happens During a Typical Paragliding Session in Da Nang

    Check-in and Briefing
    You arrive at the meeting point, usually near the intersection of Hoang Sa and Le Duc Tho streets in Son Tra District. Staff handle registration, collect any remaining payment, and provide a clear safety briefing covering harness, steering basics, and emergency procedures. This part takes about 10 minutes.

    Transfer to the Launch Site
    A vehicle drives you up the newly paved road to the takeoff area near Ban Co Peak, around 550-700 meters elevation. The winding journey offers glimpses of the peninsula’s forest and occasional monkey sightings. Expect 15-20 minutes for this leg.

    Final Prep and Takeoff
    Pilots double-check gear, help you into the harness, and wait for optimal wind. You’ll run a few steps together as the wing inflates overhead. Within seconds, you’re airborne. The initial lift feels exhilarating but smooth under a professional pilot’s control.

    The Flight
    You glide for 10-20 minutes, depending on conditions. Enjoy sweeping views of Son Tra’s greenery, the East Sea, Da Nang city, and iconic landmarks like Linh Ung Pagoda. Pilots often point out features and can perform gentle turns for better photos.

    Landing and Wrap-Up
    You descend toward a designated landing zone near the beach or Tho Quang area. Landings are usually soft on grass or sand. After unharnessing, you receive photos, videos, a certificate, and sometimes a small souvenir. The whole experience from meeting point to return typically lasts 1-1.5 hours.

    Best Operators for Paragliding in Son Tra Peninsula

    Several licensed companies operate tandem flights here, ensuring safety standards set by local authorities. Popular options include Skyture Paragliding (also known as Da Nang Paragliding Company), VN Tandem Paragliding, and operators bookable via Klook, GetYourGuide, or KKday.

    Look for providers with certified pilots, proper insurance, and recent positive reviews emphasizing professionalism. Some offer hotel pickup, English-speaking staff, and GoPro footage included or as an add-on.

    • Skyture Paragliding frequently earns praise for friendly pilots and smooth operations.
    • Smaller clubs affiliated with the Da Nang Paragliding Club may provide a more personalized feel.

    Always confirm the operator holds current permits for Son Tra, as only licensed providers can fly from the official sites.

    Cost Breakdown: How Much Does Paragliding in Da Nang Cost?

    Prices for a standard tandem flight usually range from 1.3 million to 2 million VND (roughly $50–80 USD) per person as of recent seasons. This typically covers:

    • Round-trip transfer from meeting point
    • Professional pilot and full safety gear
    • 10-20 minute flight
    • Basic photos/videos and certificate

    Add-ons like premium GoPro footage or private transfers may increase the total. Booking through platforms like Klook or GetYourGuide sometimes offers discounts or bundled experiences.

    Compare a few operators, but avoid suspiciously cheap deals that might cut corners on safety or insurance. The investment delivers memories worth far more than the price.

    Pros and Cons of Paragliding Over Son Tra Peninsula

    Pros

    • Breathtaking aerial views of Da Nang’s coast, forests, and city that you can’t get any other way
    • Surprisingly gentle and peaceful once airborne—ideal even for moderate fear-of-heights travelers
    • Short overall time commitment, fitting easily into a Da Nang itinerary
    • Professional tandem setup means no experience required
    • Often includes video footage to relive the moment

    Cons

    • Weather dependent—wind conditions can cause delays or cancellations
    • The drive up the mountain and initial run can feel intimidating for some
    • Limited flight duration compared to longer thermal flights in other destinations
    • Not suitable for very young children or those with certain medical conditions

    Overall, the pros heavily outweigh the cons for most visitors.

    Best Time to Go Paragliding in Son Tra, Da Nang

    The dry season from March to August brings the most reliable conditions: clearer skies, lighter rain risk, and consistent breezes. Mornings often offer the calmest winds before sea breezes strengthen.

    Avoid the peak rainy season (September to December) when low clouds or strong winds can ground flights. Even in good months, check forecasts—operators monitor conditions closely and prioritize safety over schedules.

    Early morning slots tend to have fewer crowds and steadier air. If your schedule allows, aim for mid-week to avoid weekend busier periods.

    What to Expect on a Windy Day vs. Calm Conditions

    On ideal calm-wind days, the flight feels like a gentle float with smooth turns. You’ll have more time to enjoy the scenery and take in details like fishing boats or forest canopies.

    Stronger wind days can mean faster launches, more dynamic flight, and sometimes shorter durations as pilots manage lift efficiently. Pilots may adjust the route slightly for safety. Either way, they only launch when conditions meet strict safety criteria.

    Many travelers say even on breezier days, the experience remains thrilling yet controlled.

    Safety First: What Makes Son Tra Paragliding Reliable

    Licensed operators use certified equipment with regular maintenance and carry insurance. Pilots undergo training and often hold international credentials. The site’s managed status by Da Nang authorities adds another layer of oversight.

    Before every flight, gear gets inspected and weather assessed. Tandem setups include backup parachutes. Serious incidents remain rare when flying with reputable providers.

    Still, disclose any health concerns upfront. Conditions like recent injuries, heart issues, or pregnancy may require medical clearance or make the activity unsuitable.

    Comparison: Paragliding in Son Tra vs. Other Vietnamese Spots

    AspectSon Tra Peninsula (Da Nang)Mui Ne or Other Coastal SpotsNorthern Mountain Sites
    Elevation~550-700mLower coastalHigher, more variable
    Flight Duration10-20 minutesOften shorterCan be longer with thermals
    SceneryCoast, city, forest, seaBeaches and dunesRice terraces, mountains
    AccessibilityGood paved roadsBeach launchesRougher access
    Best ForBeginners & viewsRelaxed coastal vibeExperienced pilots
    Season ReliabilityHigh in dry monthsWind-dependentMore seasonal variation

    Son Tra stands out for its balance of accessibility, safety infrastructure, and spectacular mixed scenery.

    Gear and Equipment Used in Da Nang Paragliding

    You don’t need to bring anything special. Operators supply the wing, harness, helmet, and reserve parachute. Footwear with good grip helps during the short run.

    Pilots use high-quality, regularly inspected gear from reputable brands. Some carry radios for communication and cameras for capturing your flight. The setup prioritizes comfort and visibility so you can relax and look around.

    Tips from Experienced Flyers for First-Timers

    Relax your body during the run—tensing up makes it harder. Look forward or at the horizon rather than straight down initially. Breathe steadily; the pilot will talk you through everything.

    Capture the moment mentally as much as with a camera. Many people say the real magic happens when you stop worrying and just feel the air.

    If possible, watch a couple of takeoff videos the night before so the process feels familiar. And smile—your pilot will likely snap some great in-flight shots.

    After Your Flight: Landing, Photos, and That Post-Flight Glow

    Landing zones are chosen for soft, open ground. You might jog a few steps on touchdown as the wing deflates. The sense of accomplishment hits hard—high-fives and laughter are common.

    Operators usually provide digital photos or video clips shortly after. Some include a small certificate as a keepsake. Take time to reflect on the views you just experienced; many travelers say the perspective shift stays with them long after.

    Combining Paragliding with Other Son Tra Activities

    Make a full day of your visit. Before or after flying, explore Linh Ung Pagoda with its giant statue, hike short forest trails, or visit the Monkey Mountain viewpoints. The peninsula offers scenic drives, fresh seafood spots, and beach relaxation nearby.

    Some packages combine paragliding with city tours or street food experiences. Landing near the coast makes it easy to grab a cold drink and watch the waves while replaying your flight in your mind.

    People Also Ask (PAA)

    Is paragliding in Da Nang safe for beginners?
    Yes, when done with licensed tandem pilots using proper equipment. No prior experience is needed, and operators prioritize safety with thorough briefings and weather checks.

    How long does the paragliding flight last in Son Tra?
    Actual flight time is typically 10-20 minutes, with the entire experience from check-in to landing lasting about 1 to 1.5 hours.

    What should I wear for paragliding in Da Nang?
    Comfortable long pants, closed-toe shoes with grip, and layers for variable temperatures. Avoid skirts, loose jewelry, or anything that could catch wind.

    Can kids do paragliding in Son Tra Peninsula?
    Age and height/weight restrictions apply—usually minimum age is around 12-14 depending on the operator. Check with the specific provider and consult a doctor for younger participants.

    Do I get photos or video from my Da Nang paragliding experience?
    Most operators include basic photos and video or offer GoPro footage as part of the package or for an extra fee.

    FAQ – Common Questions About Paragliding in Son Tra Peninsula, Da Nang

    Do I need previous experience?
    No. Tandem flights are designed for complete beginners. Your pilot manages everything while you enjoy the ride.

    What if the weather cancels my flight?
    Reputable operators offer rescheduling or refunds if conditions prevent safe flying. They monitor weather closely and communicate early.

    Is there a weight limit?
    Most providers have limits around 90-110 kg for tandem passengers. Confirm exact figures when booking as they vary slightly.

    How do I book paragliding in Da Nang?
    Book directly through operator websites, or use trusted platforms like Klook, GetYourGuide, KKday, or Viator for reviews and secure payments. Some offer hotel pickup.

    Can I fly solo eventually?
    Tandem flights are the starting point. Serious training courses exist through local clubs for those who want to learn independently, but they require significant time and commitment.

    Paragliding over Son Tra Peninsula remains one of Da Nang’s most rewarding adventures. The combination of natural beauty, professional operation, and that unforgettable floating sensation creates moments you’ll replay for years. If you’re in Central Vietnam and crave a fresh perspective—literally—don’t miss it.

    Pack your sense of adventure, trust the process, and prepare to see Da Nang like never before. The skies above Monkey Mountain are waiting.

    (Word count: approximately 2,780)

    Note: Always verify current prices, operators, and safety requirements directly before your trip, as conditions and regulations can evolve.

    Internal links (for a travel site):

    External resources:

    • Da Nang Paragliding Club information
    • Official tourism sites for weather and safety updates

    This article focuses solely on delivering practical, firsthand-style guidance to help you plan and enjoy your paragliding experience in Son Tra Peninsula, Da Nang. Safe travels and happy flying!